Language
 Canada
How To Set Up a Print-ready File for Packaging
What do you need to start your design?
1. Adobe Illustrator or Adobe InDesign - it is recommended you use one of these two programs to create print-ready files.
2. Dieline.
Generate and download the dieline from Newprint website
1. Go to Newprint's Custom Packaging page.
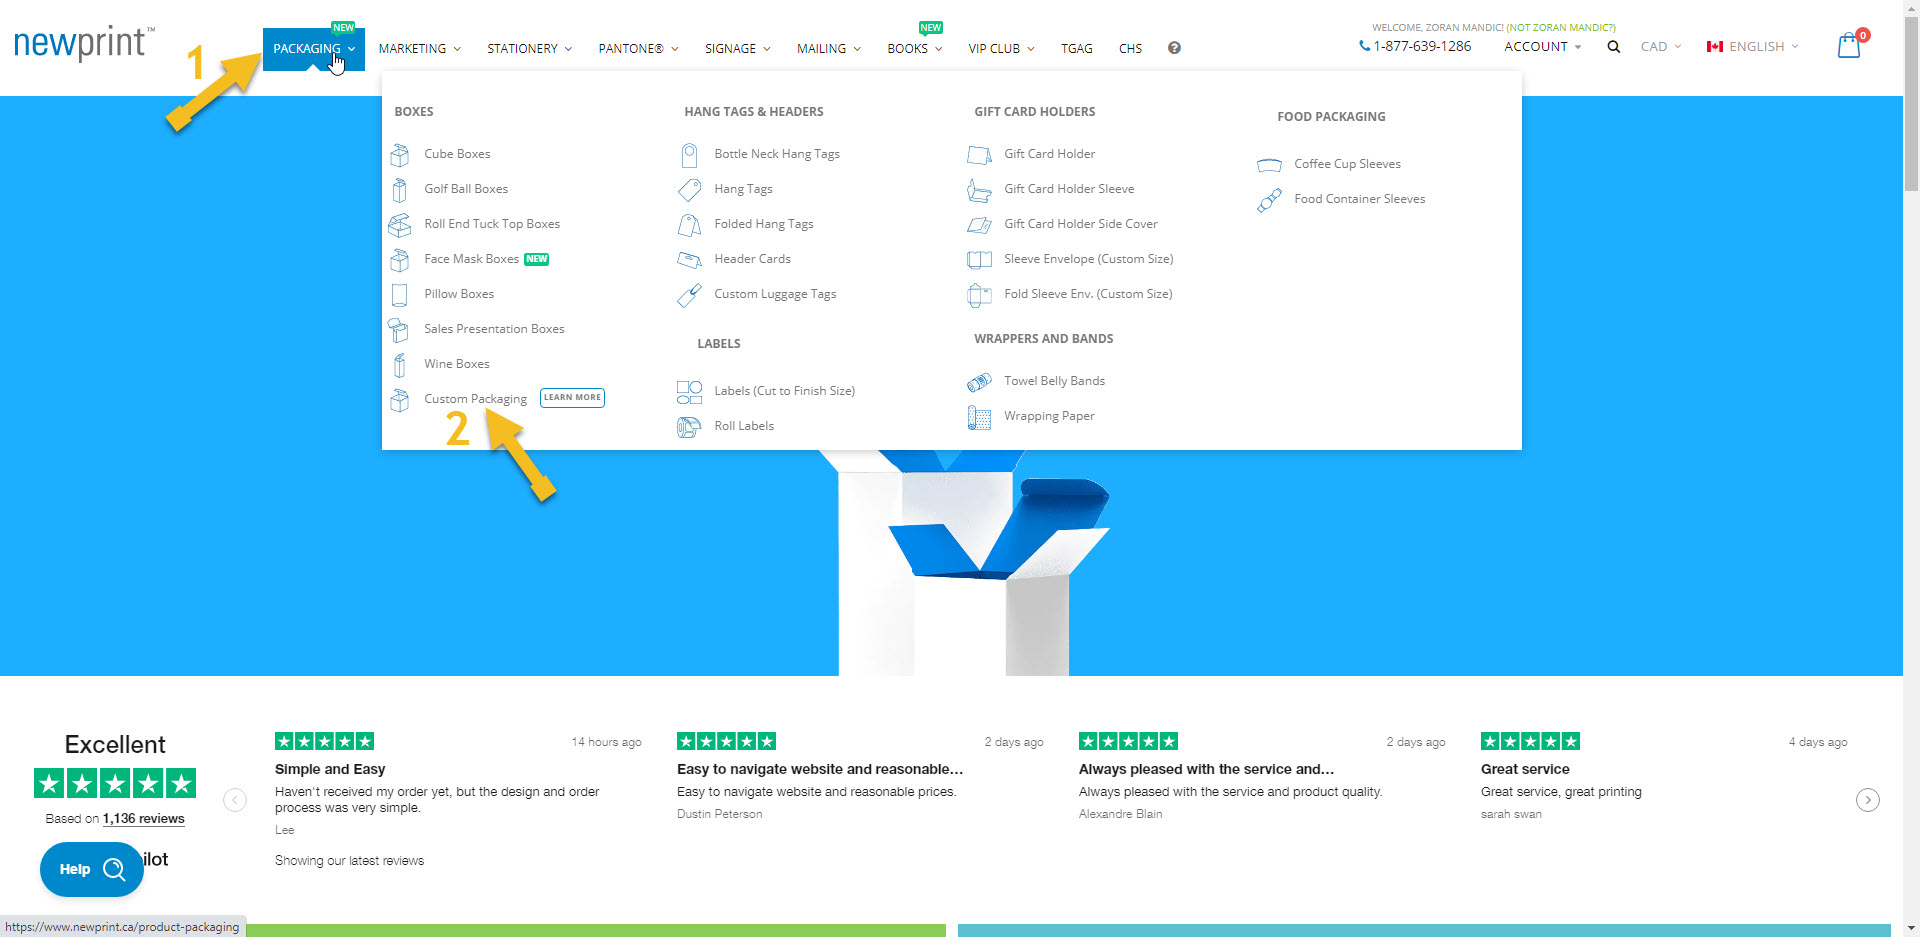
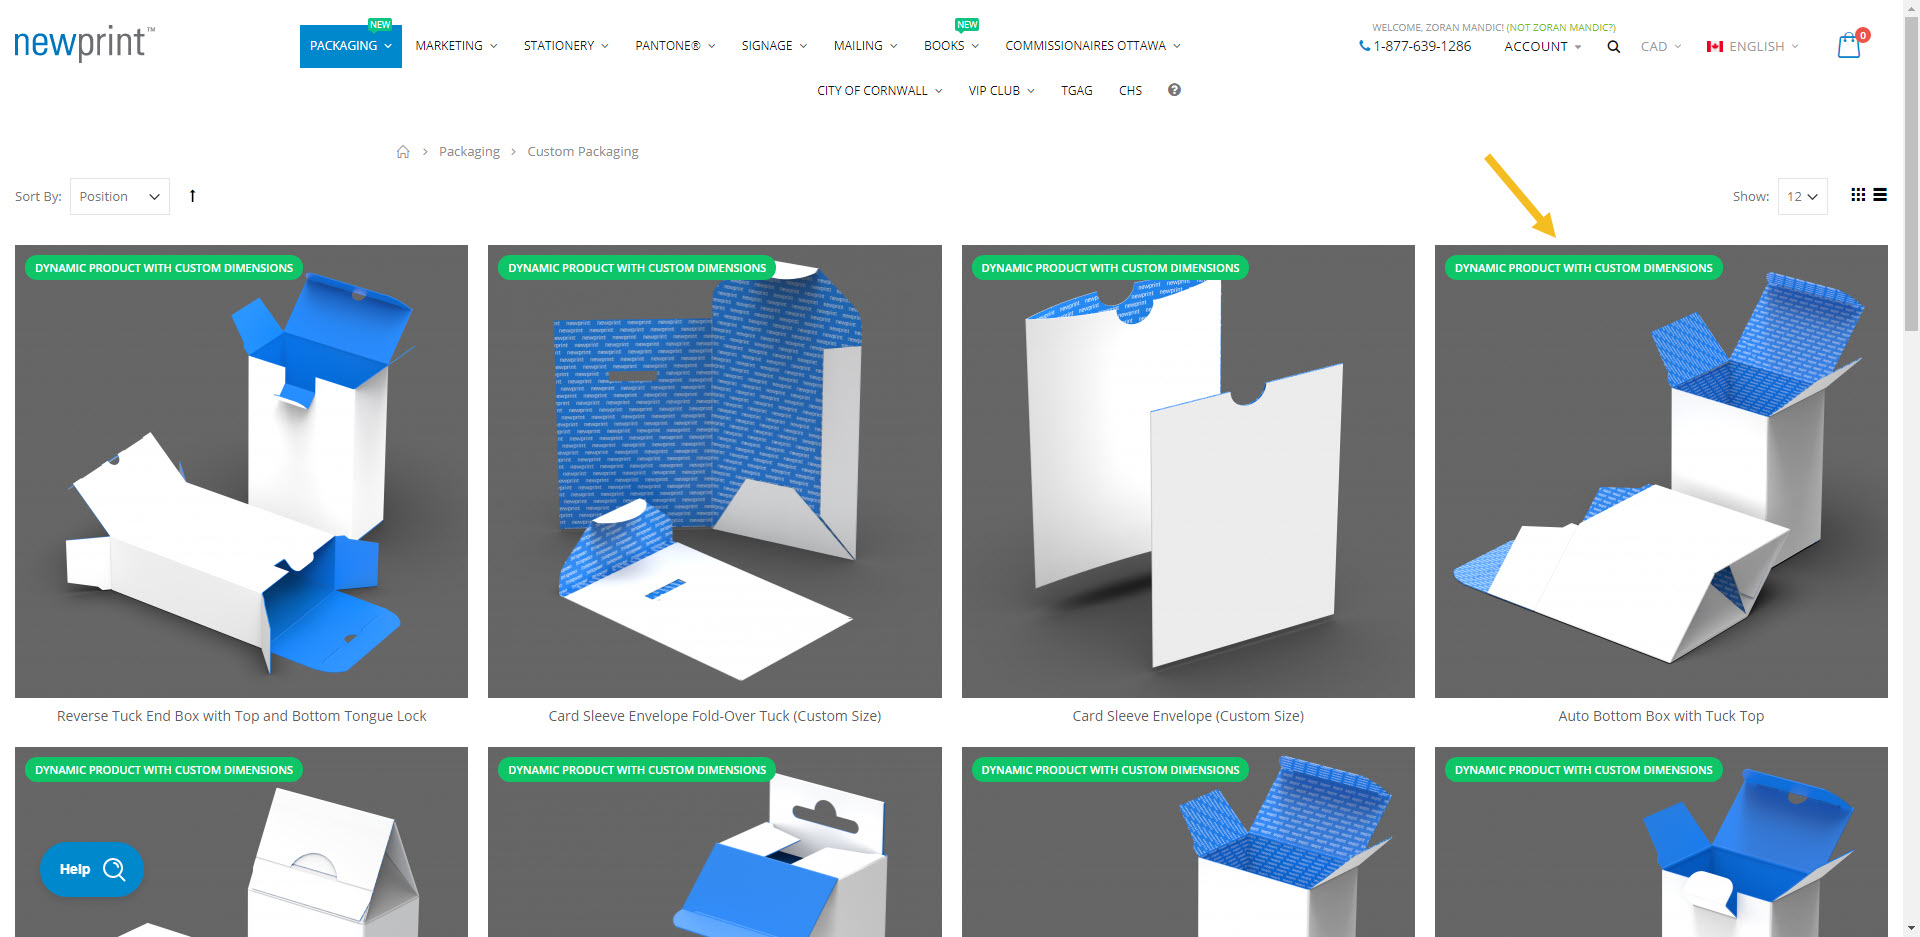
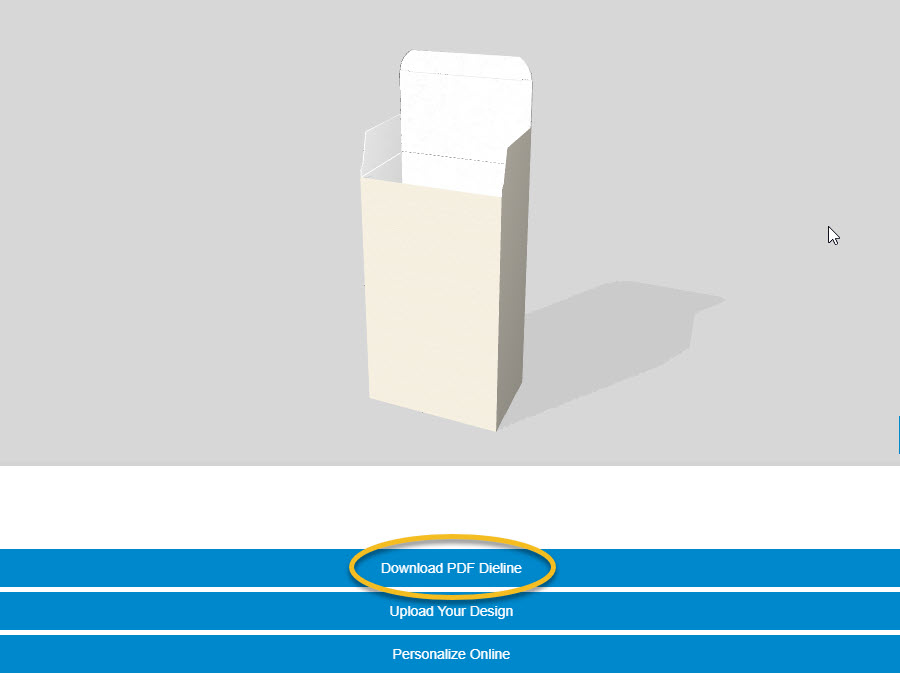
2. Browse the page and click on the type of packaging that you need (for example, Auto Bottom Box with Tuck Top).
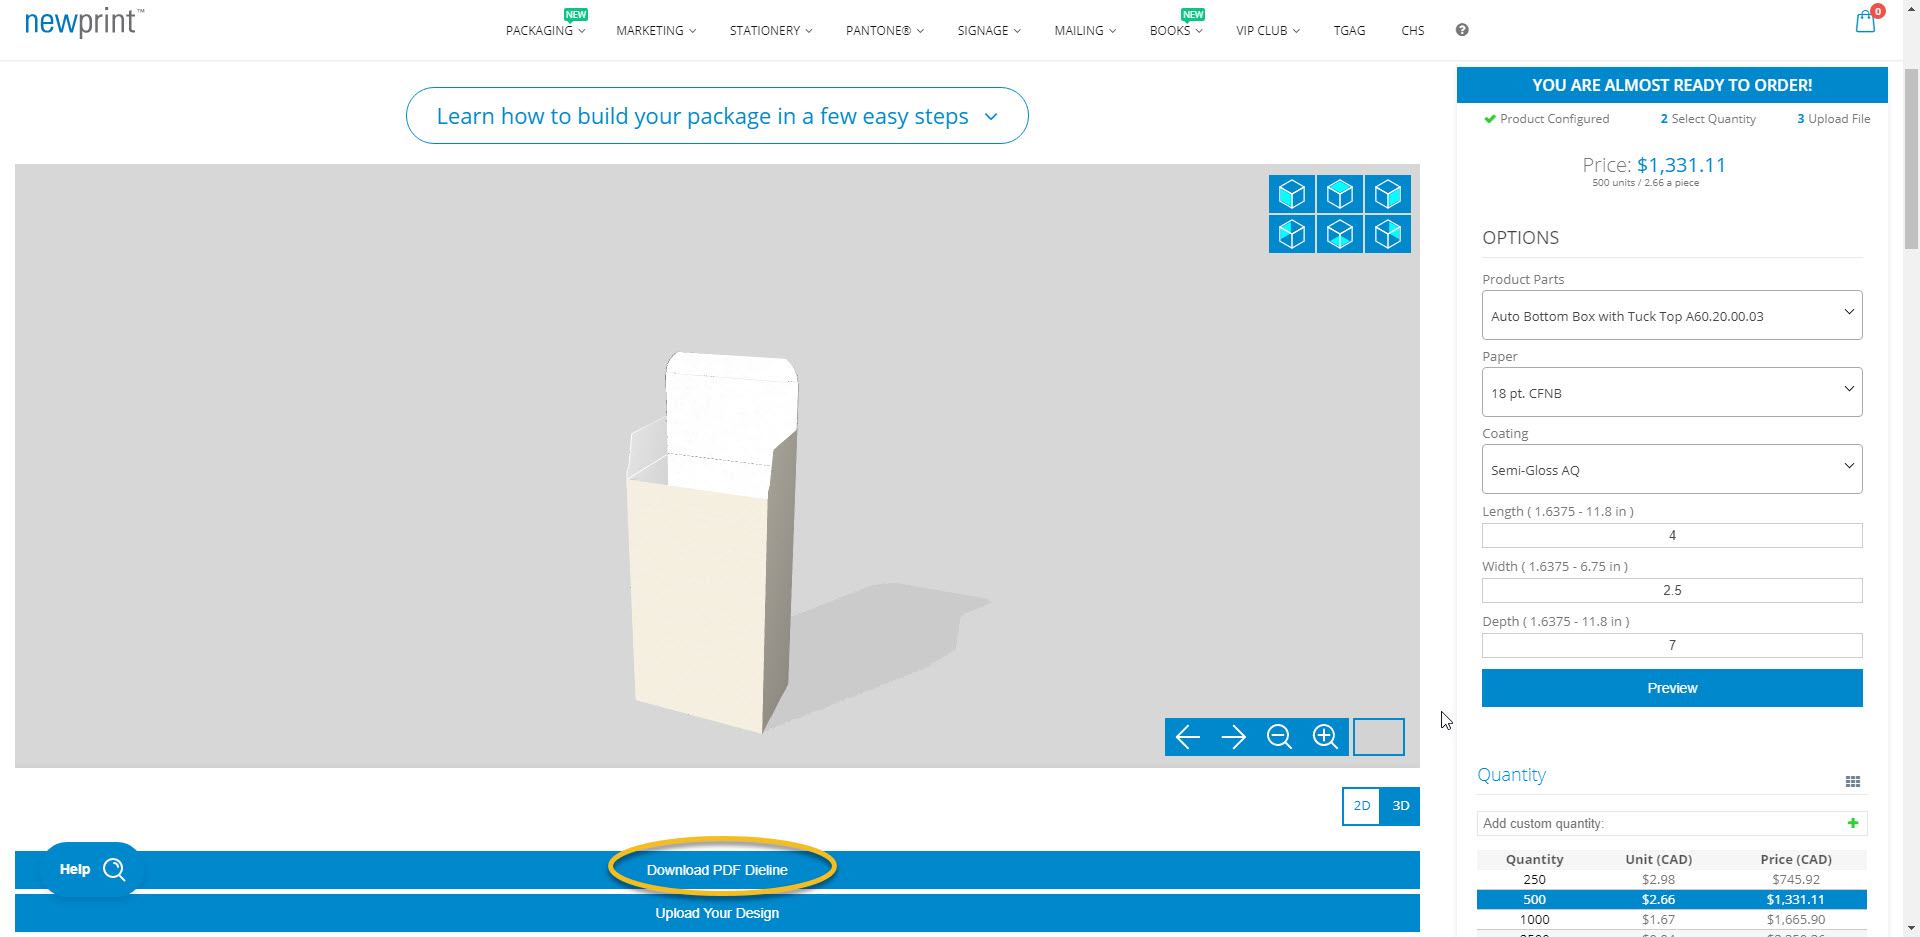
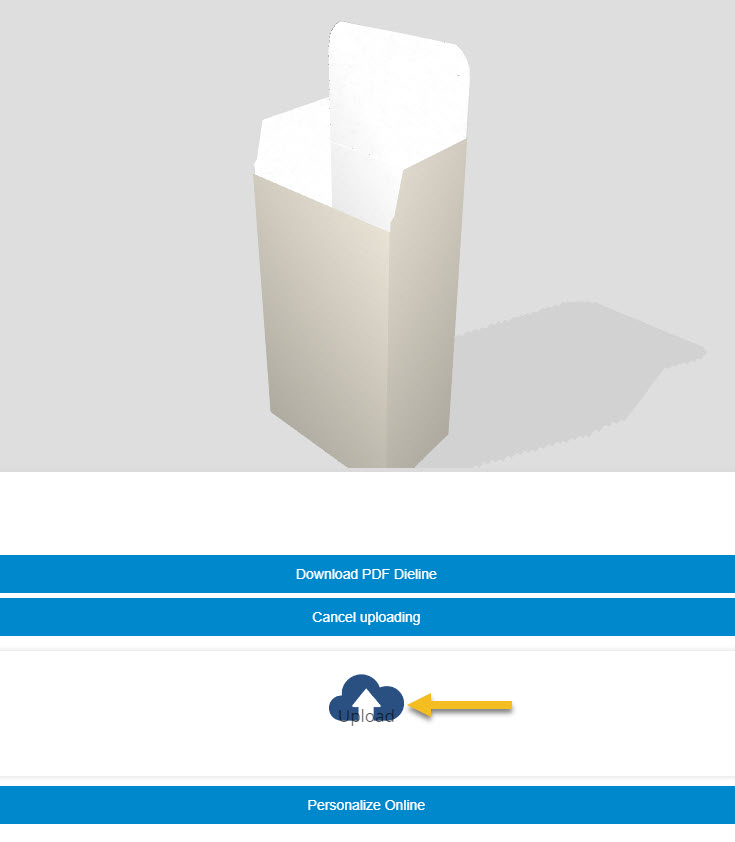
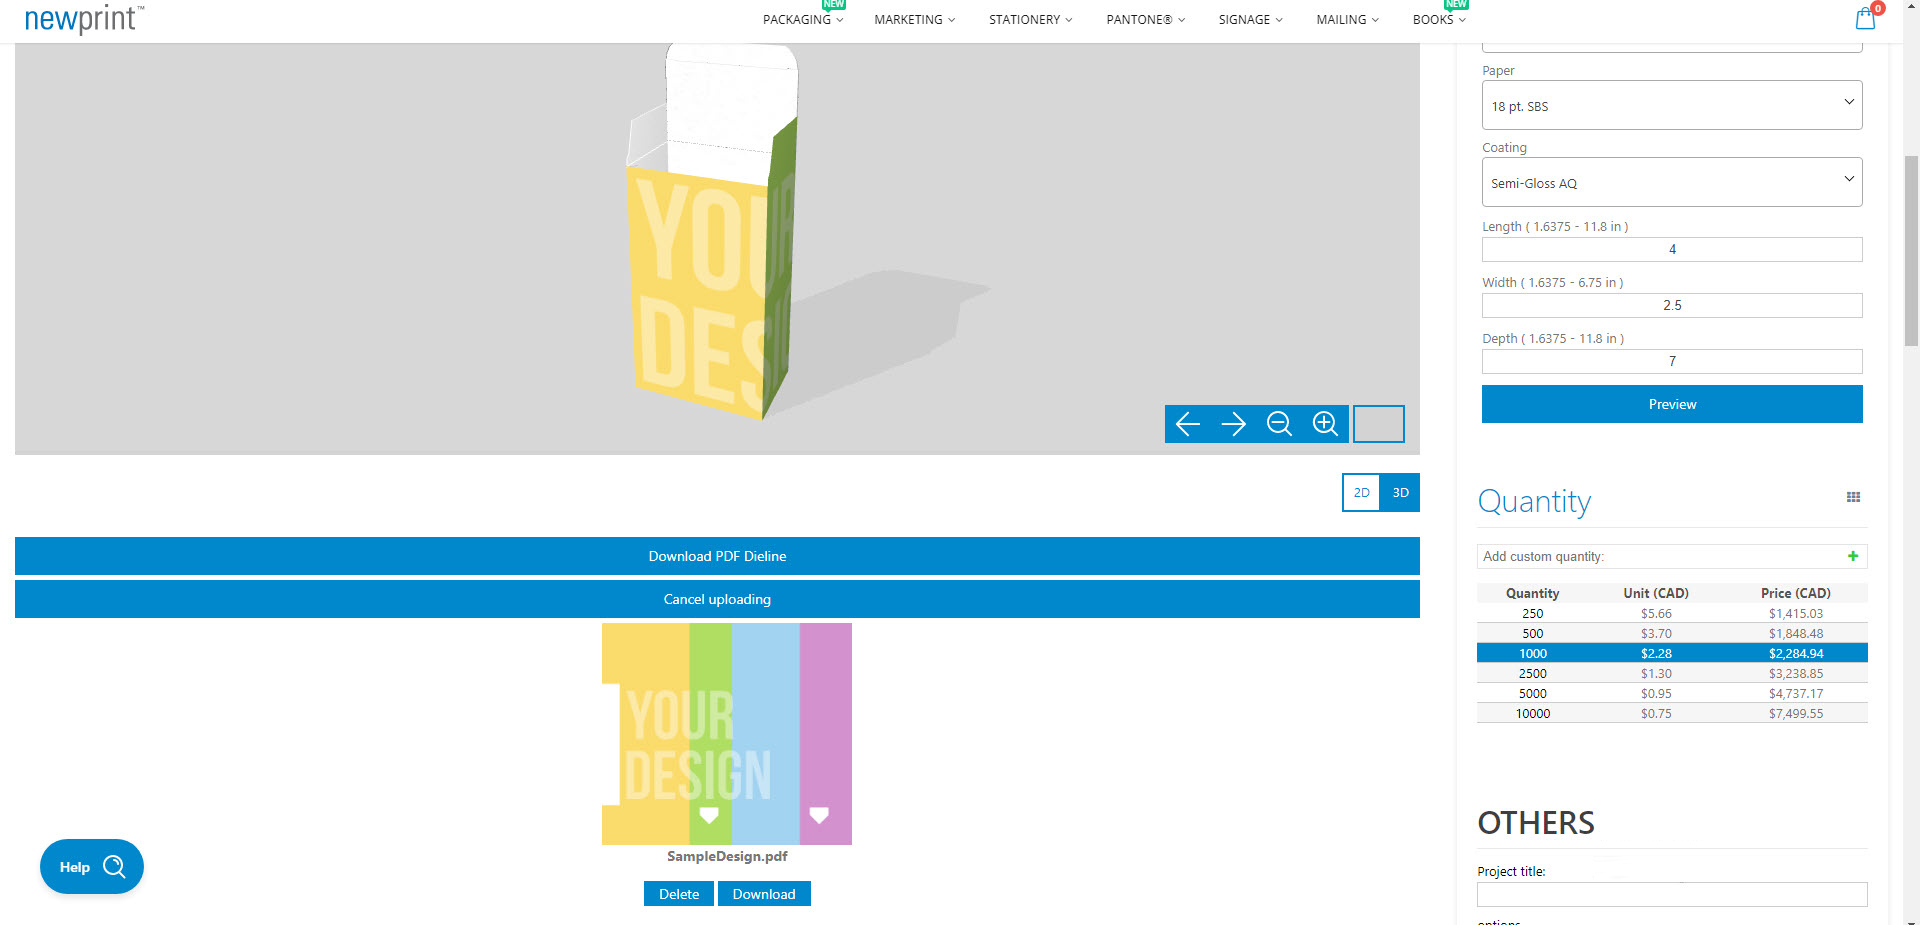
3. Enter the size of your box and click Preview. You can preview 2D and 3D versions of your box.

4. Click Download PDF Dieline and save it to your hard drive.
Edit your dieline file
There are a few things you need to do in order to set up this file correctly and use it as a base for your design:
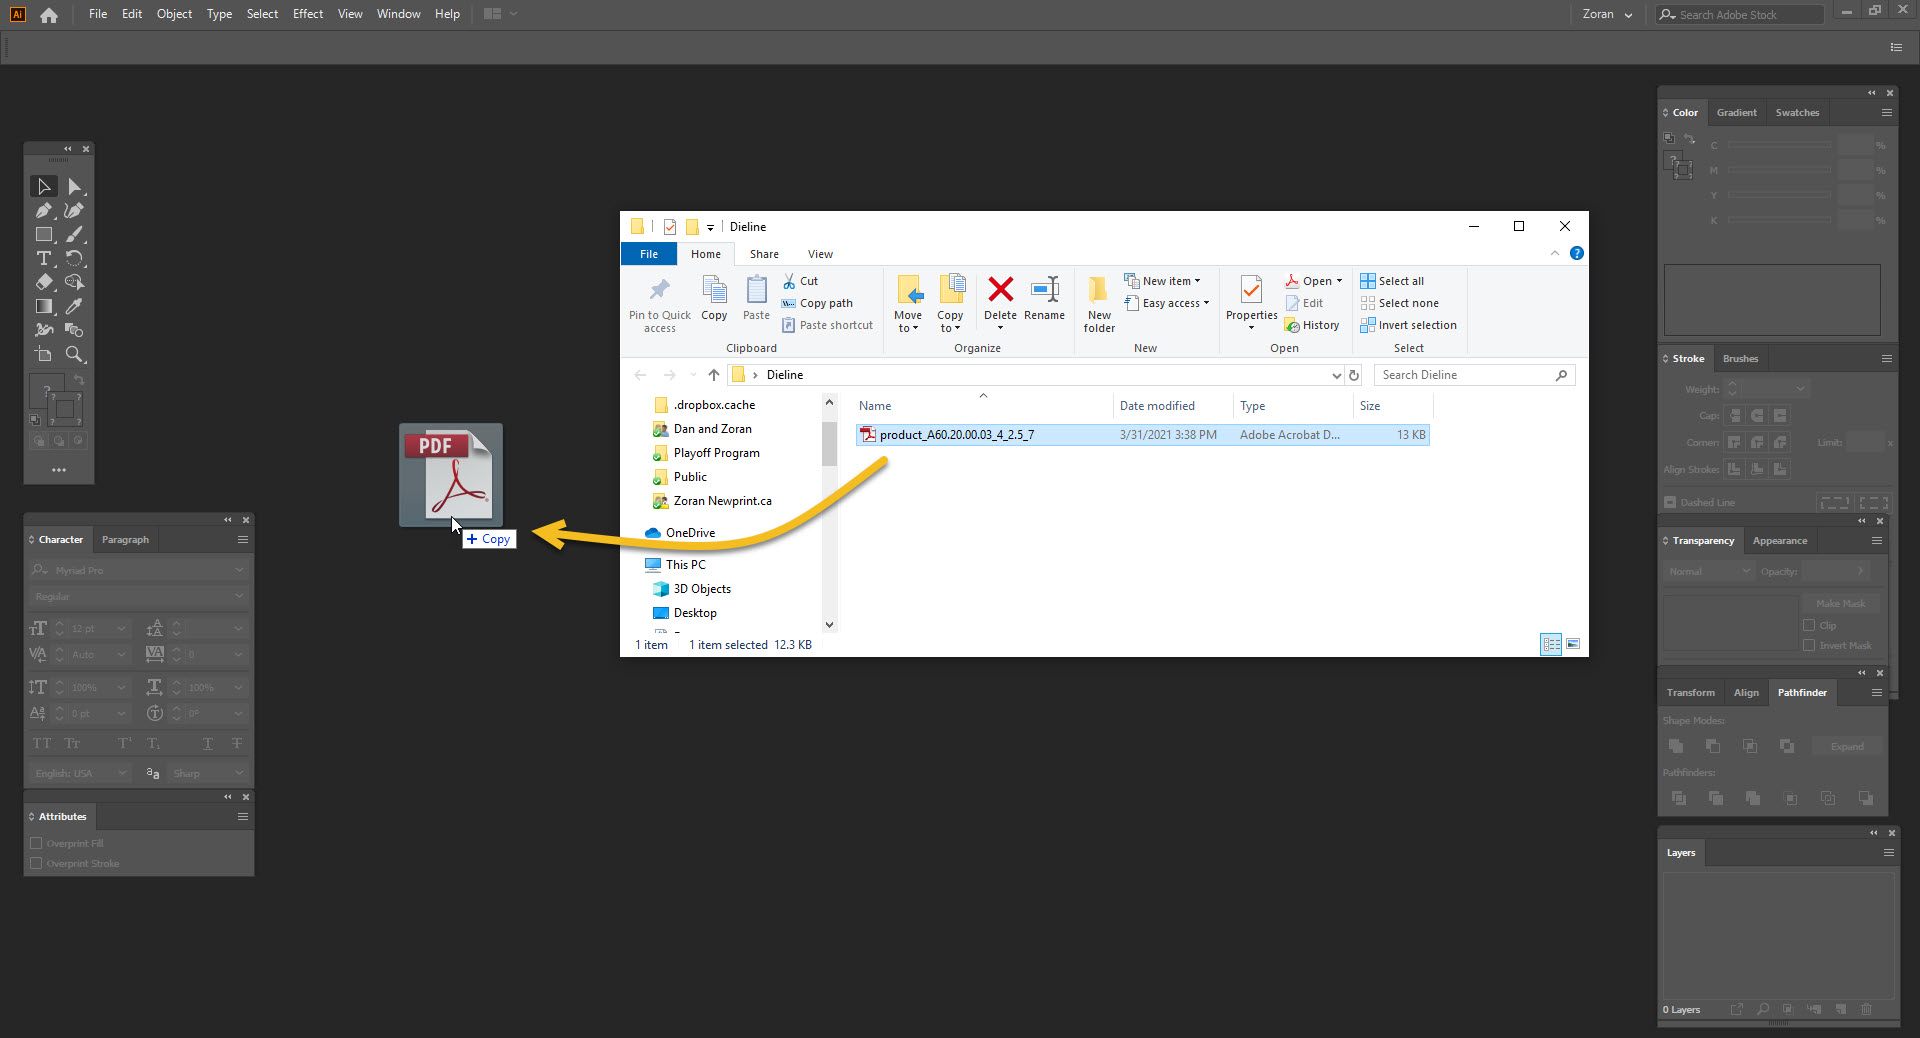
1. Drag and drop the PDF file you generated to Adobe Illustrator.
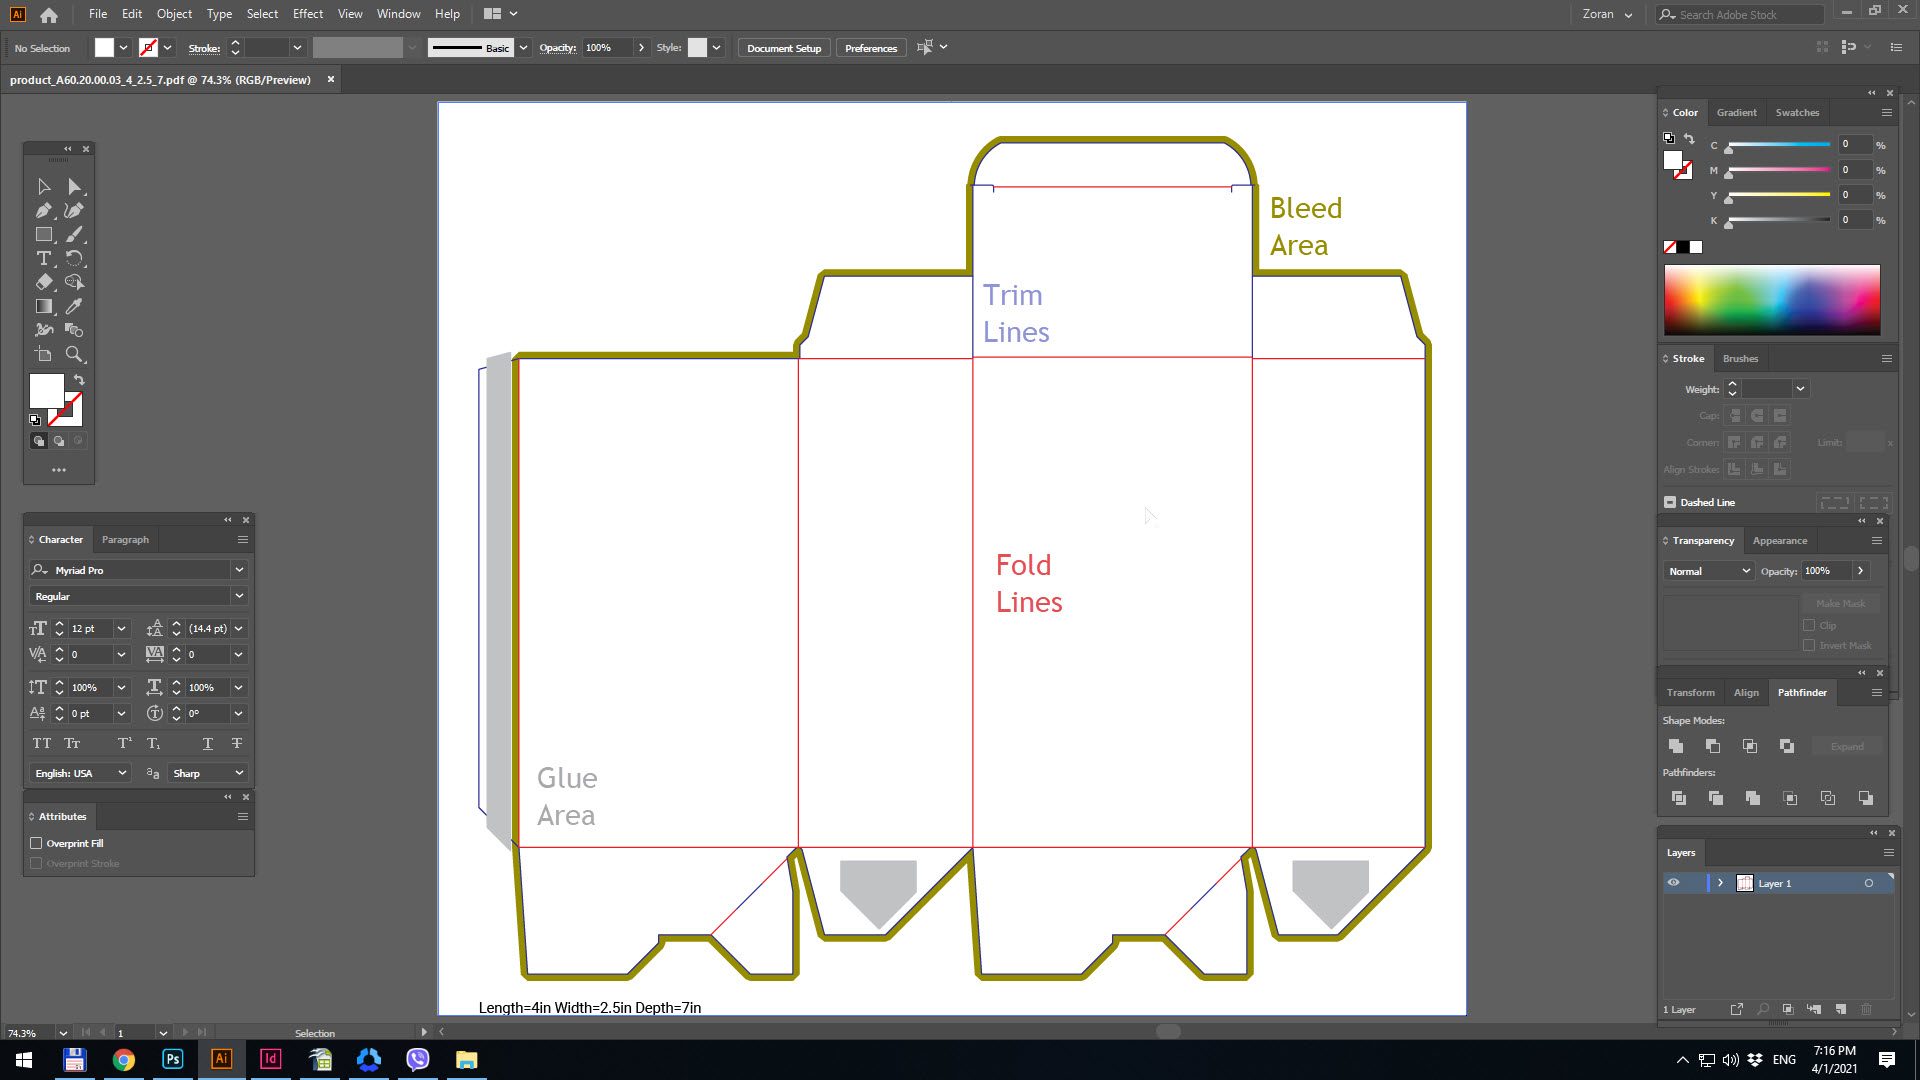
The key elements of the dieline template are Trim Lines, Fold Lines, Bleed Area and Glue Area.
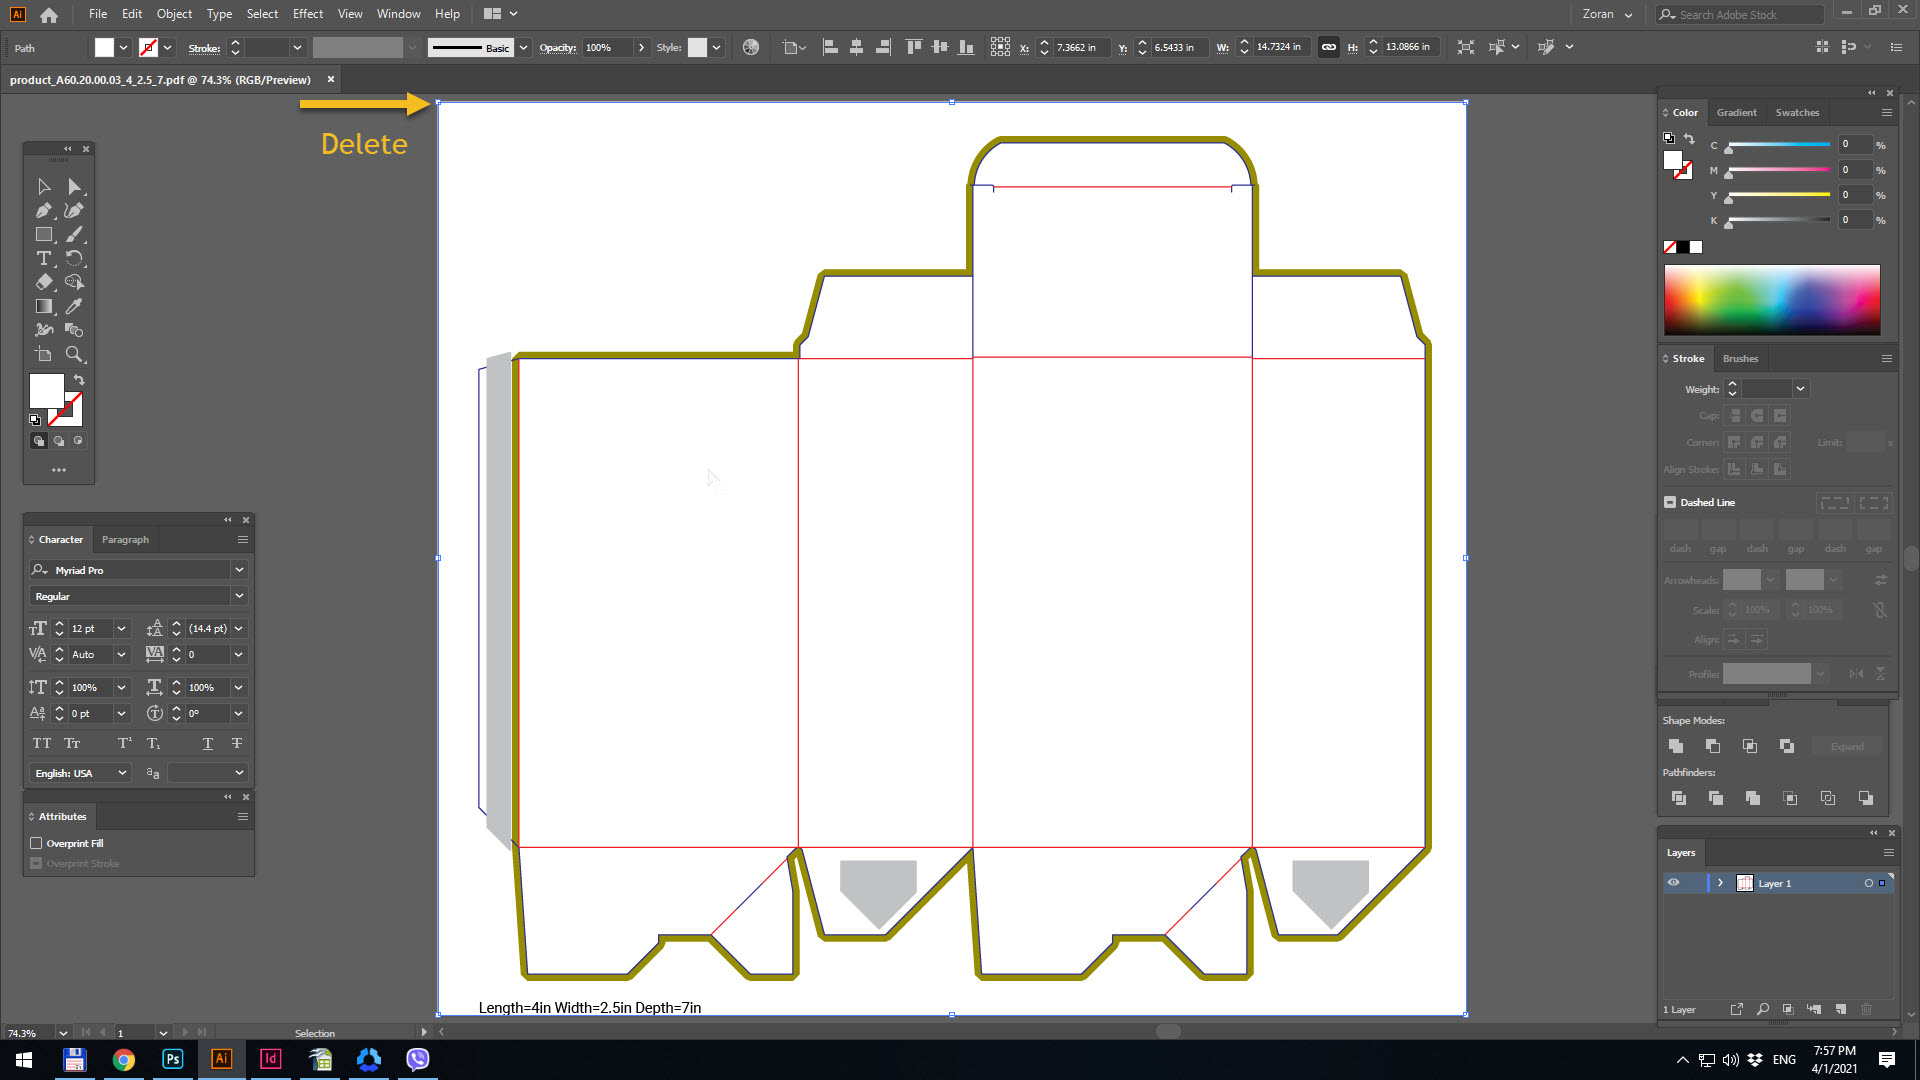
2. The template is also generated with a white rectangle object in the background and it needs to be deleted. Click anywhere on the white area to select the rectangle and press Delete on your keyboard to delete this object.
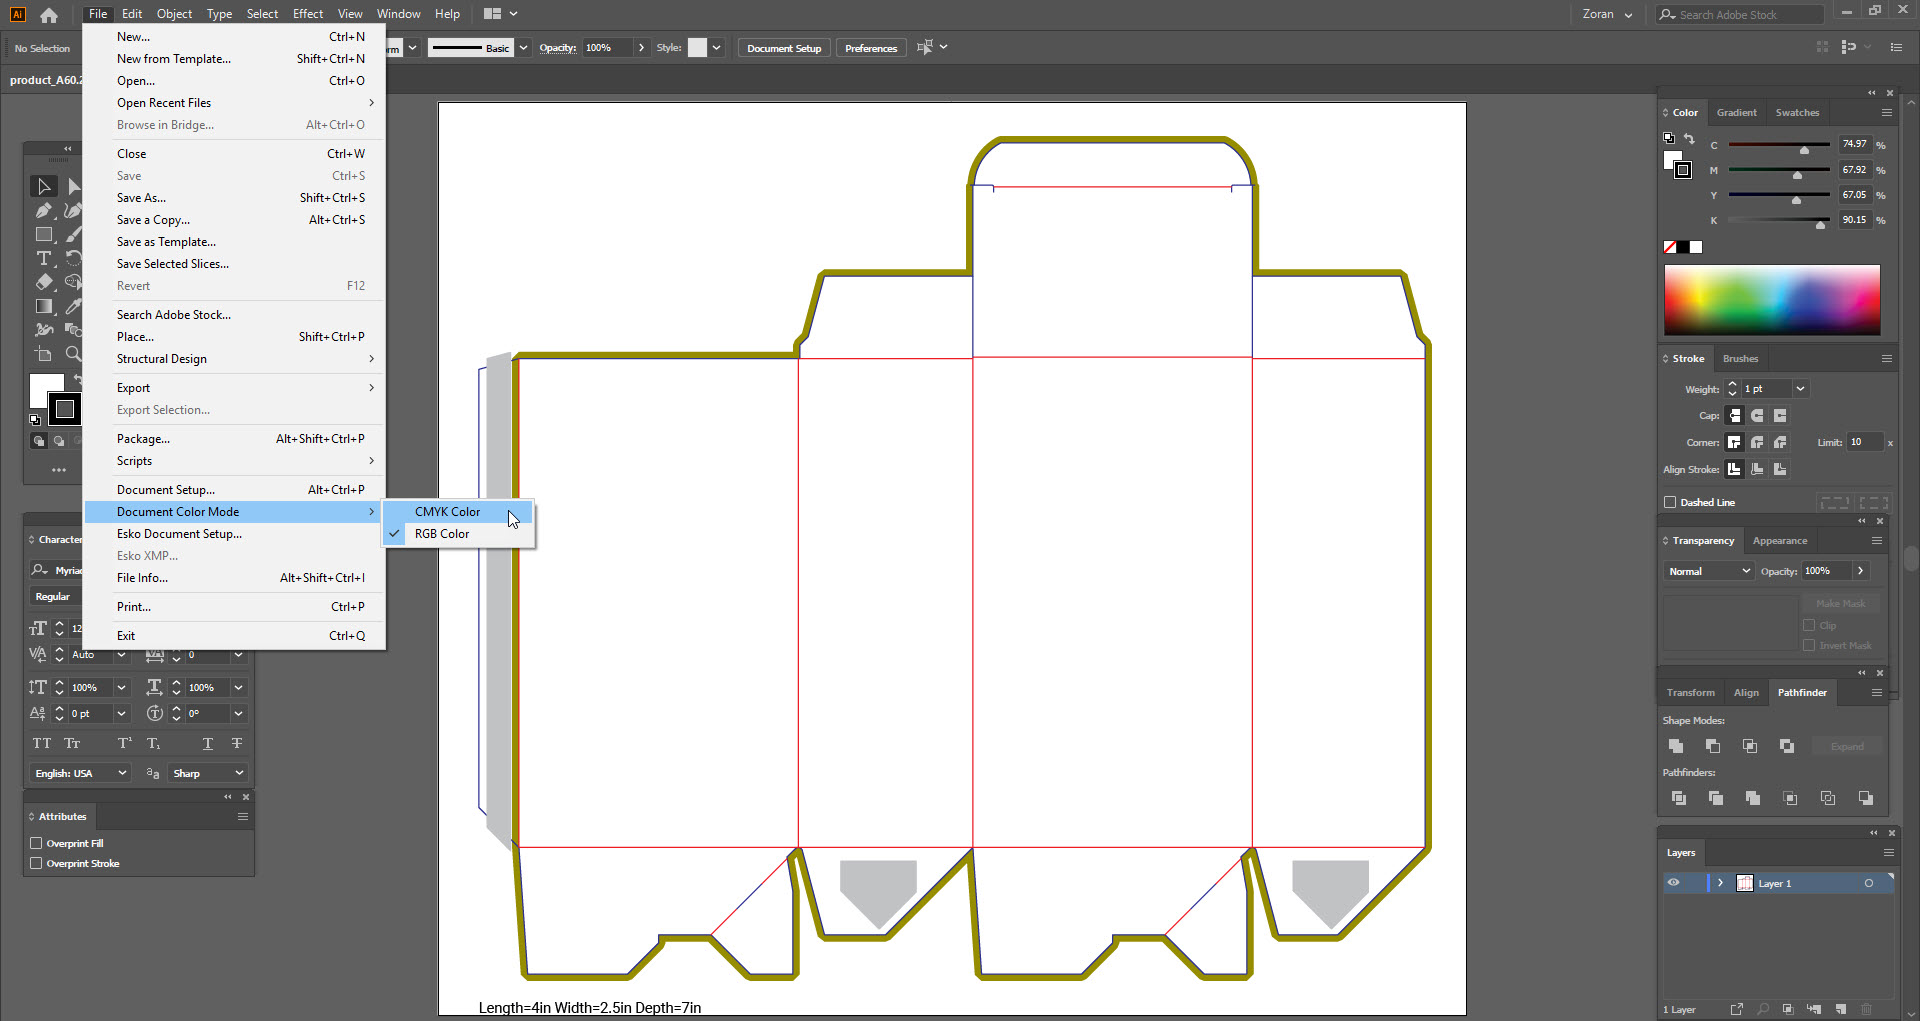
3. Go to File / Document Color Mode and change the colour mode to CMYK.
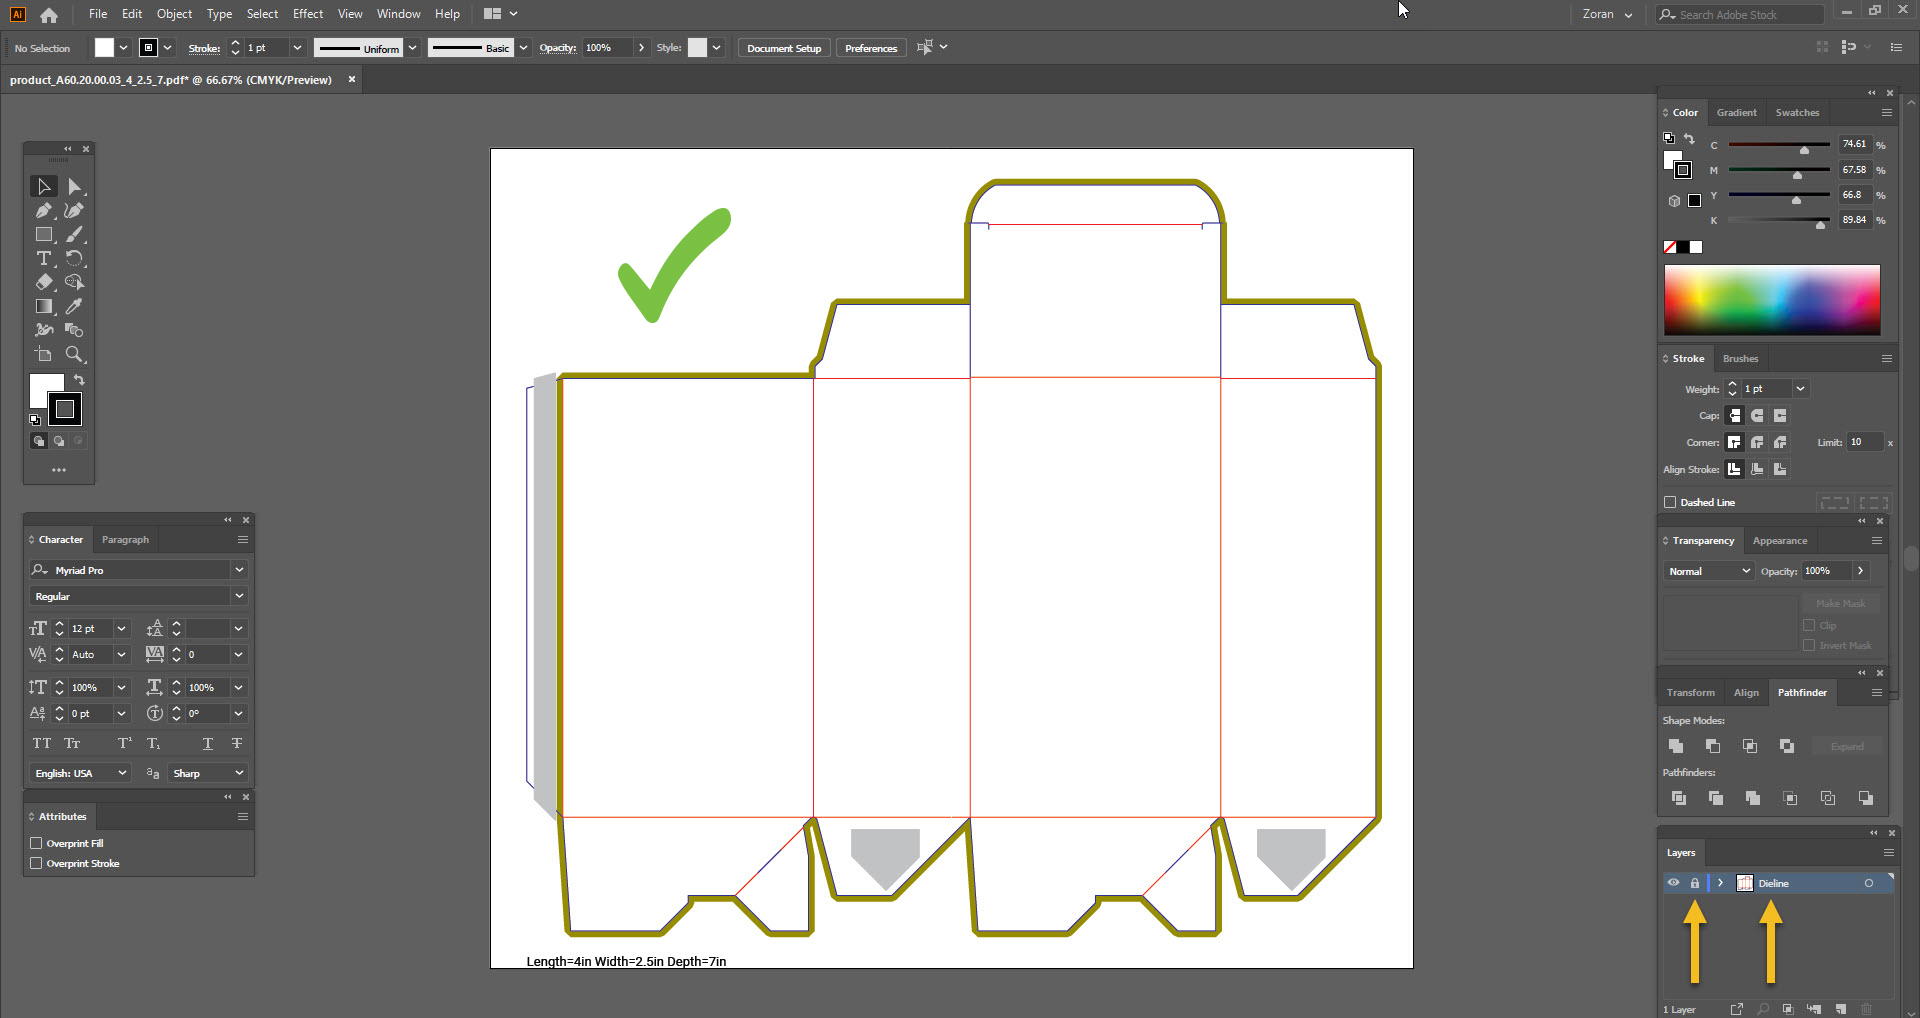
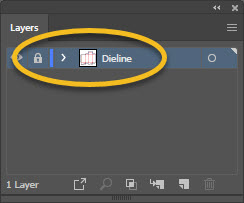
4. Rename the layer to Dieline and lock the layer. It is very important that you do not move the dieline or change the artboard size
5. Add a new layer.
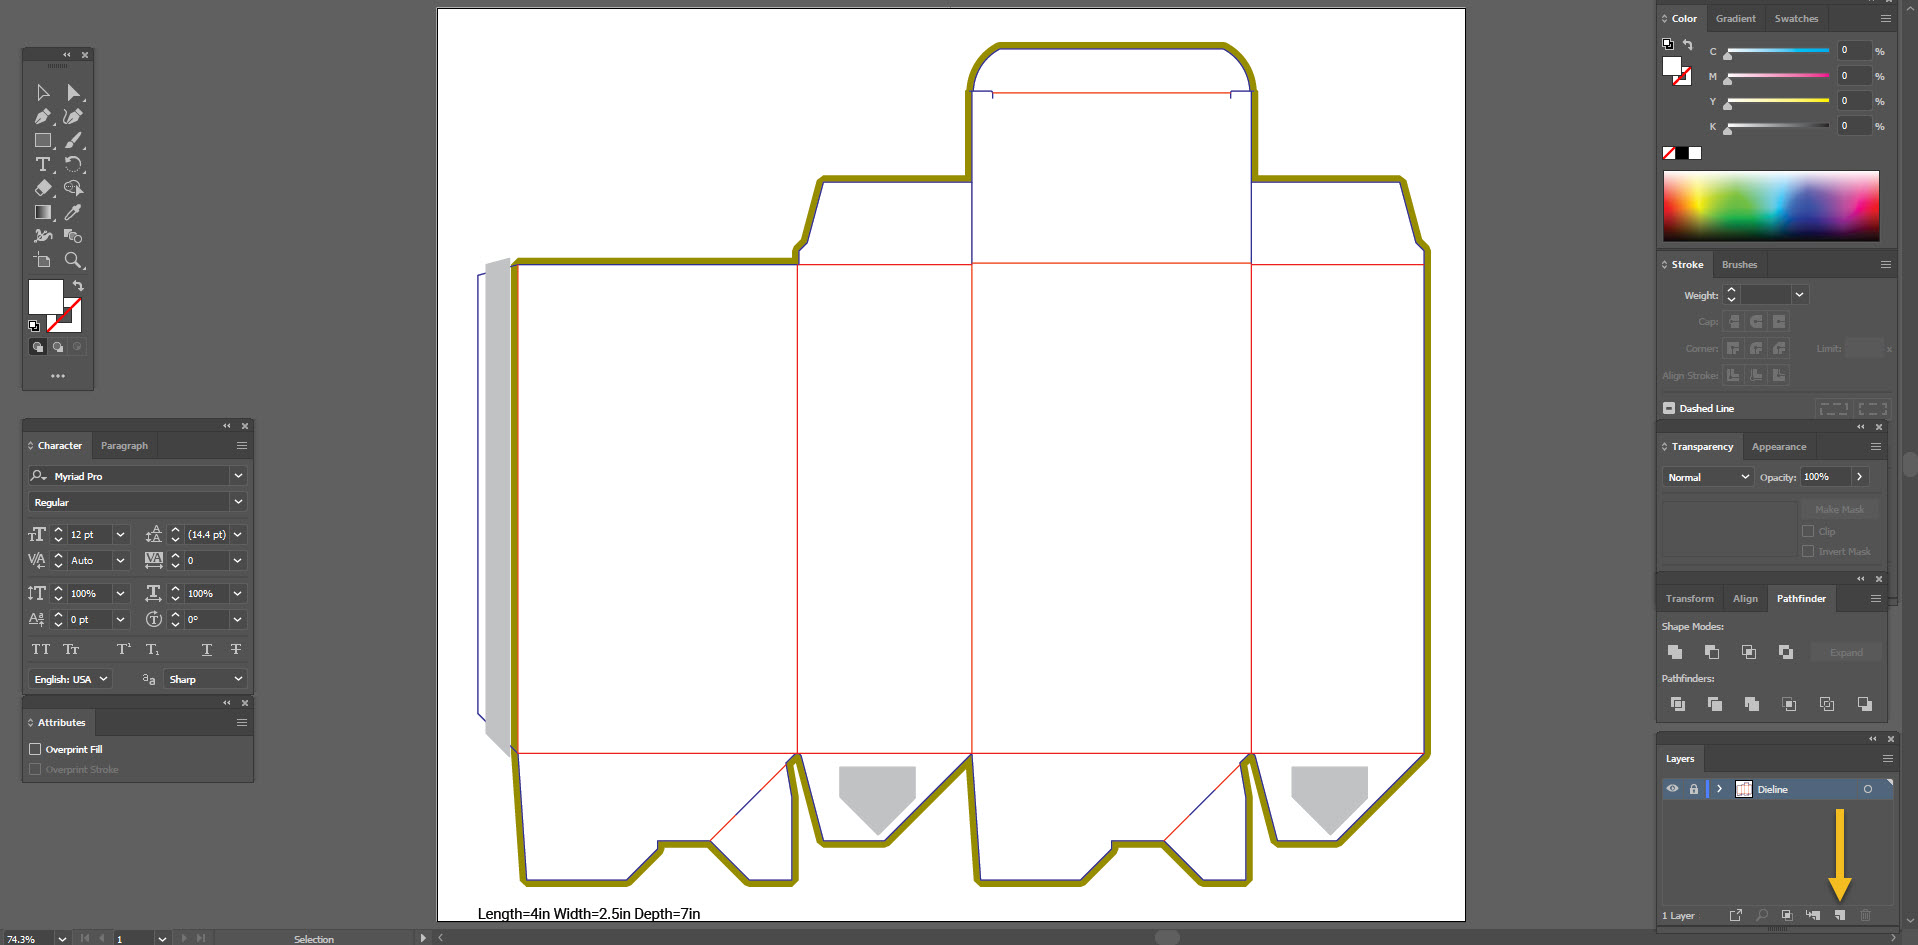
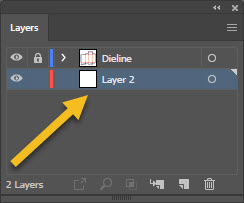
6. Click and drag the new layer below the dieline layer.
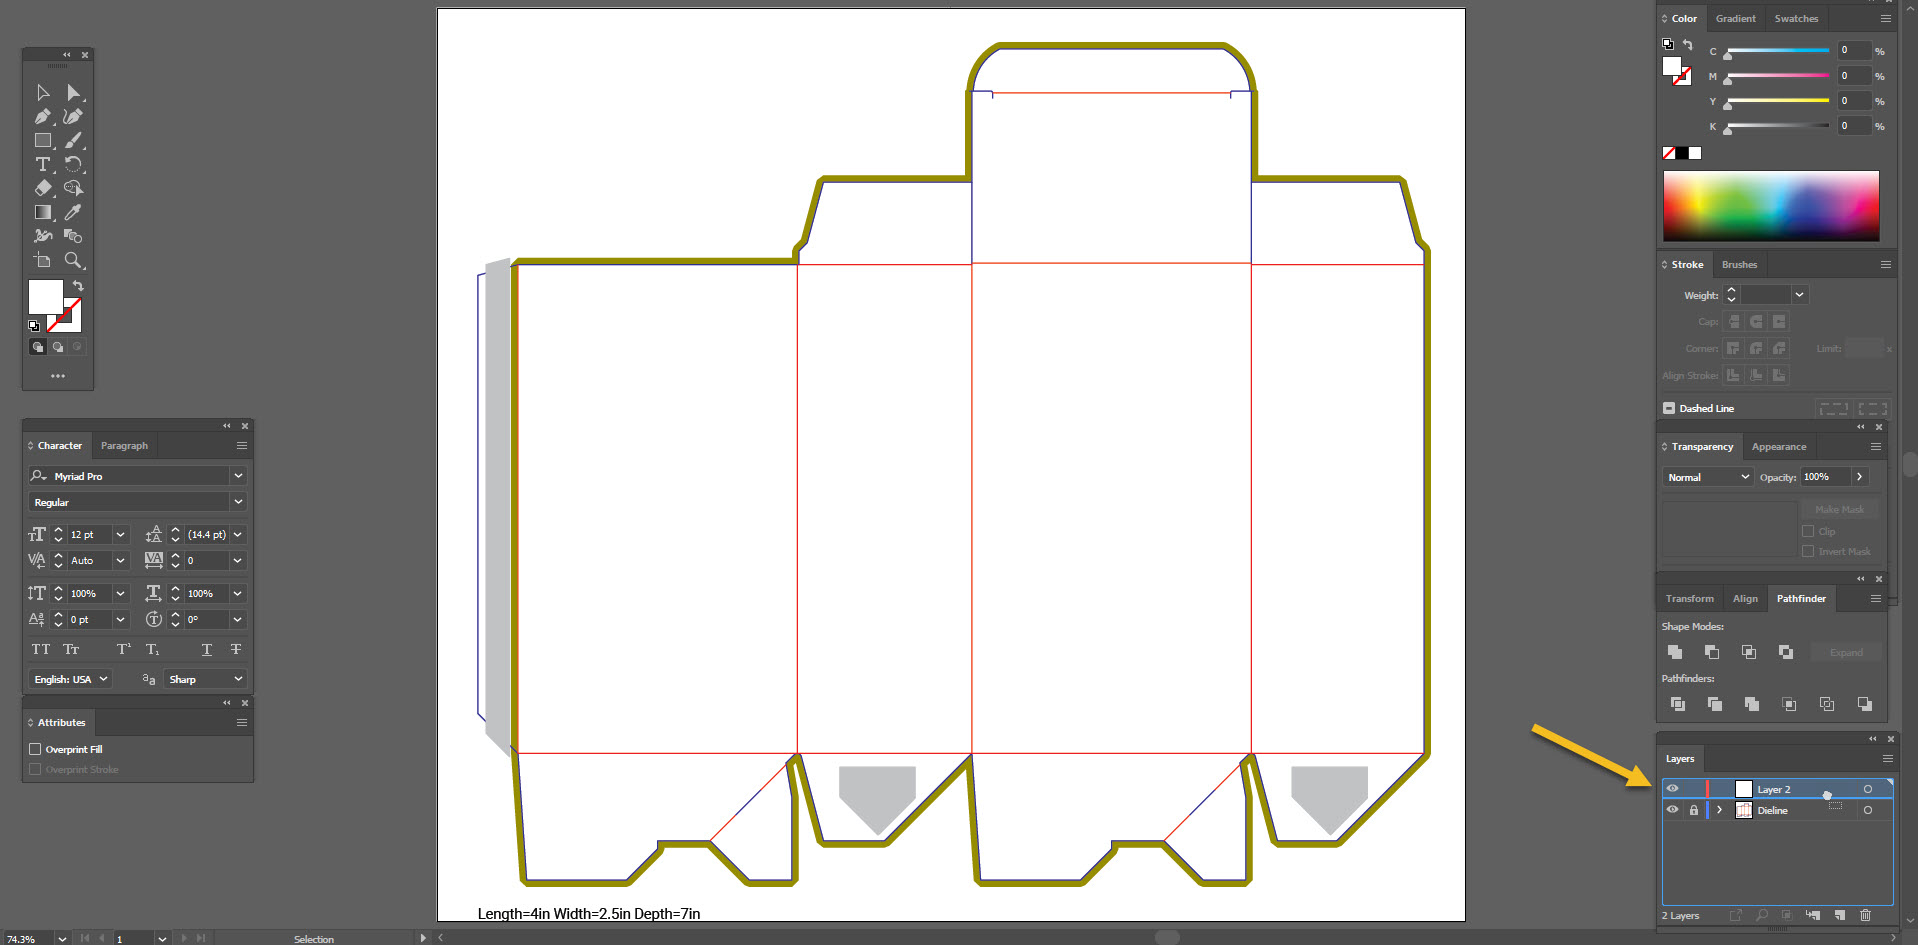
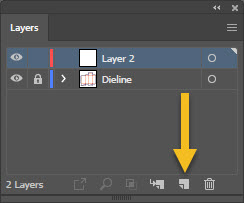
Double-click the layer name and rename the new layer to Artwork.
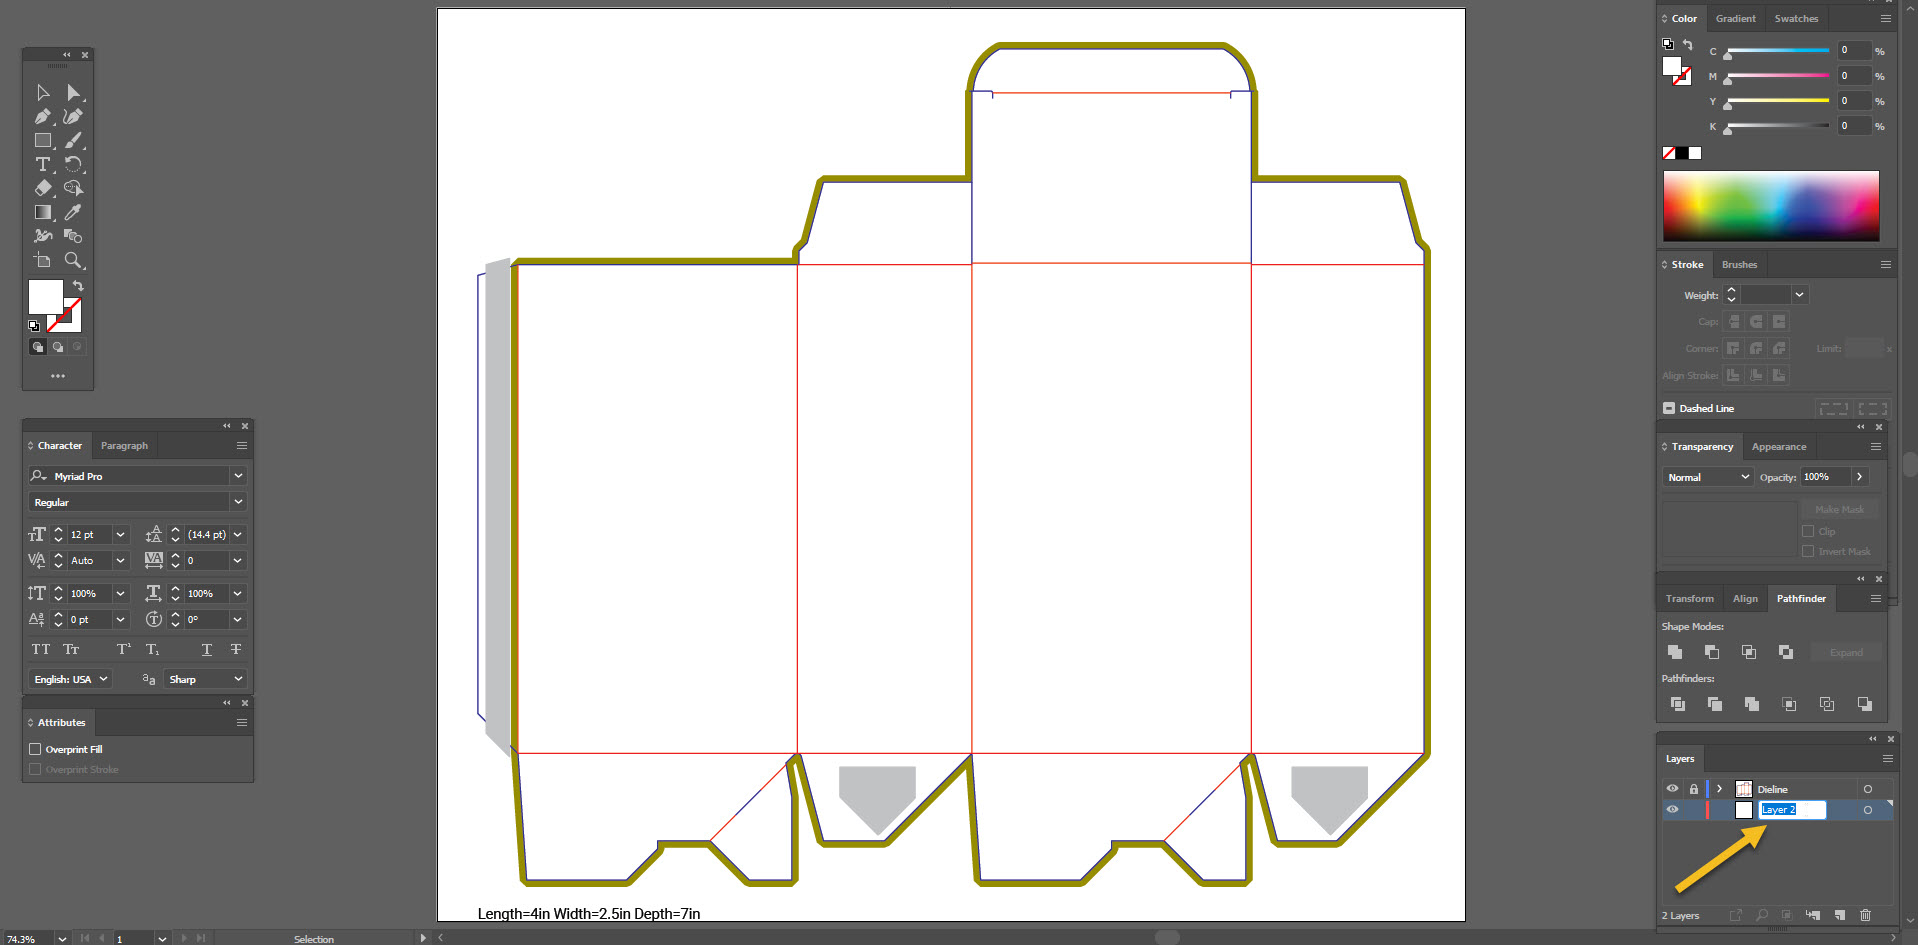
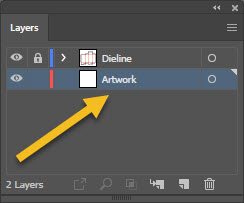
This way the dieline will be on its own layer, and the design elements on a separate layer. It is very important that the dieline and the artwork are on separate layers.
How to set up your design
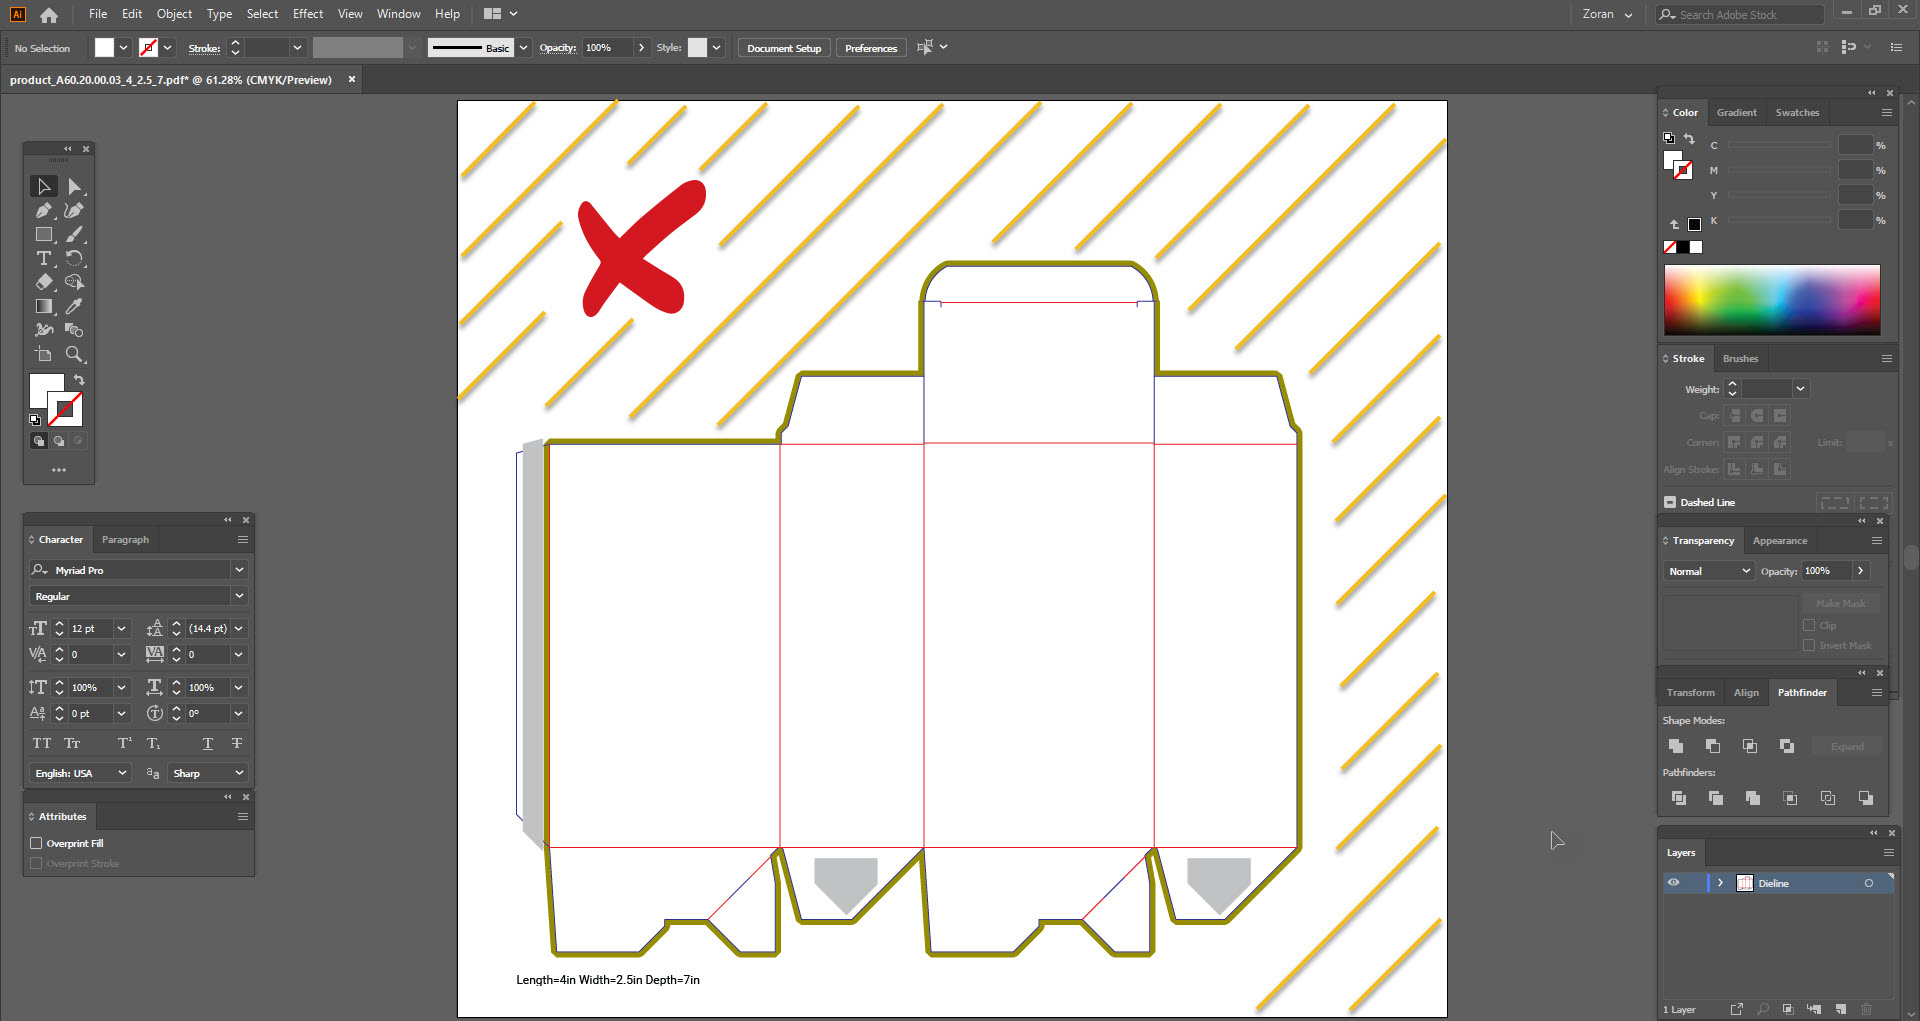
The background elements should go all the way to the edges of the artboard, but the glue area must be ink-free (white).
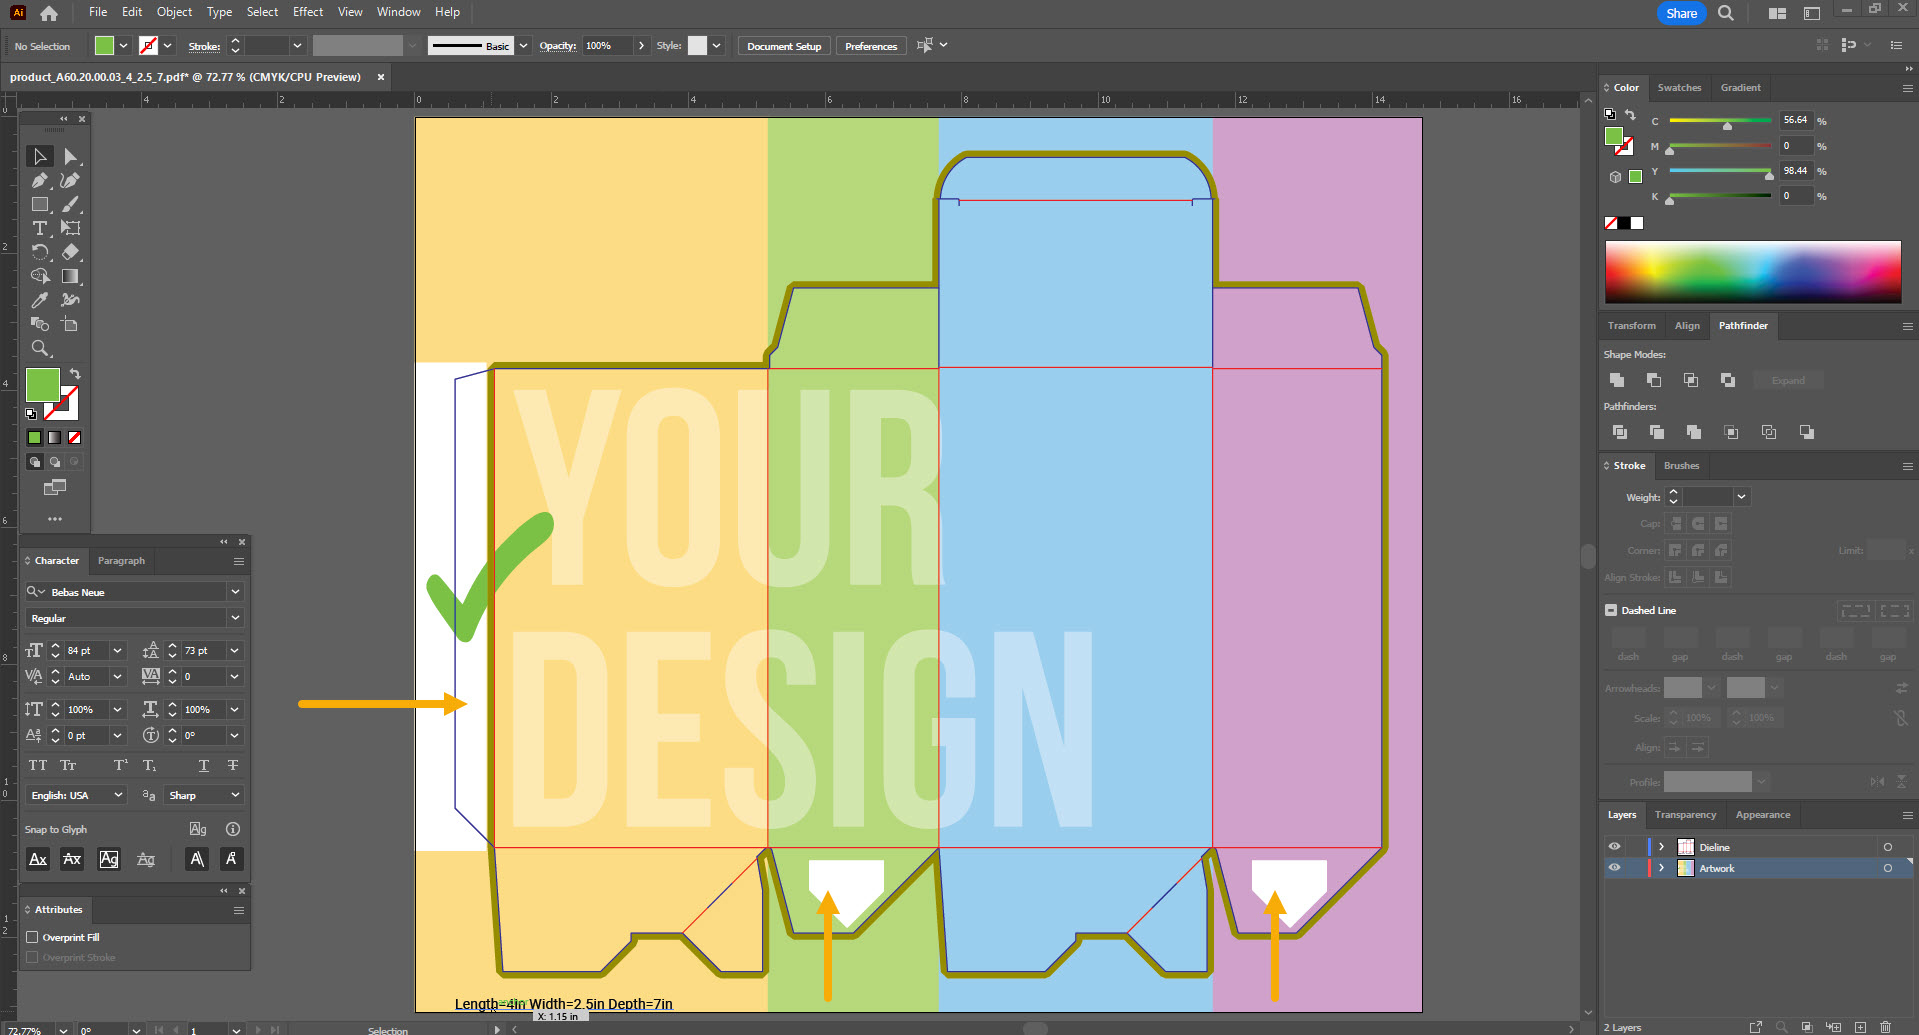
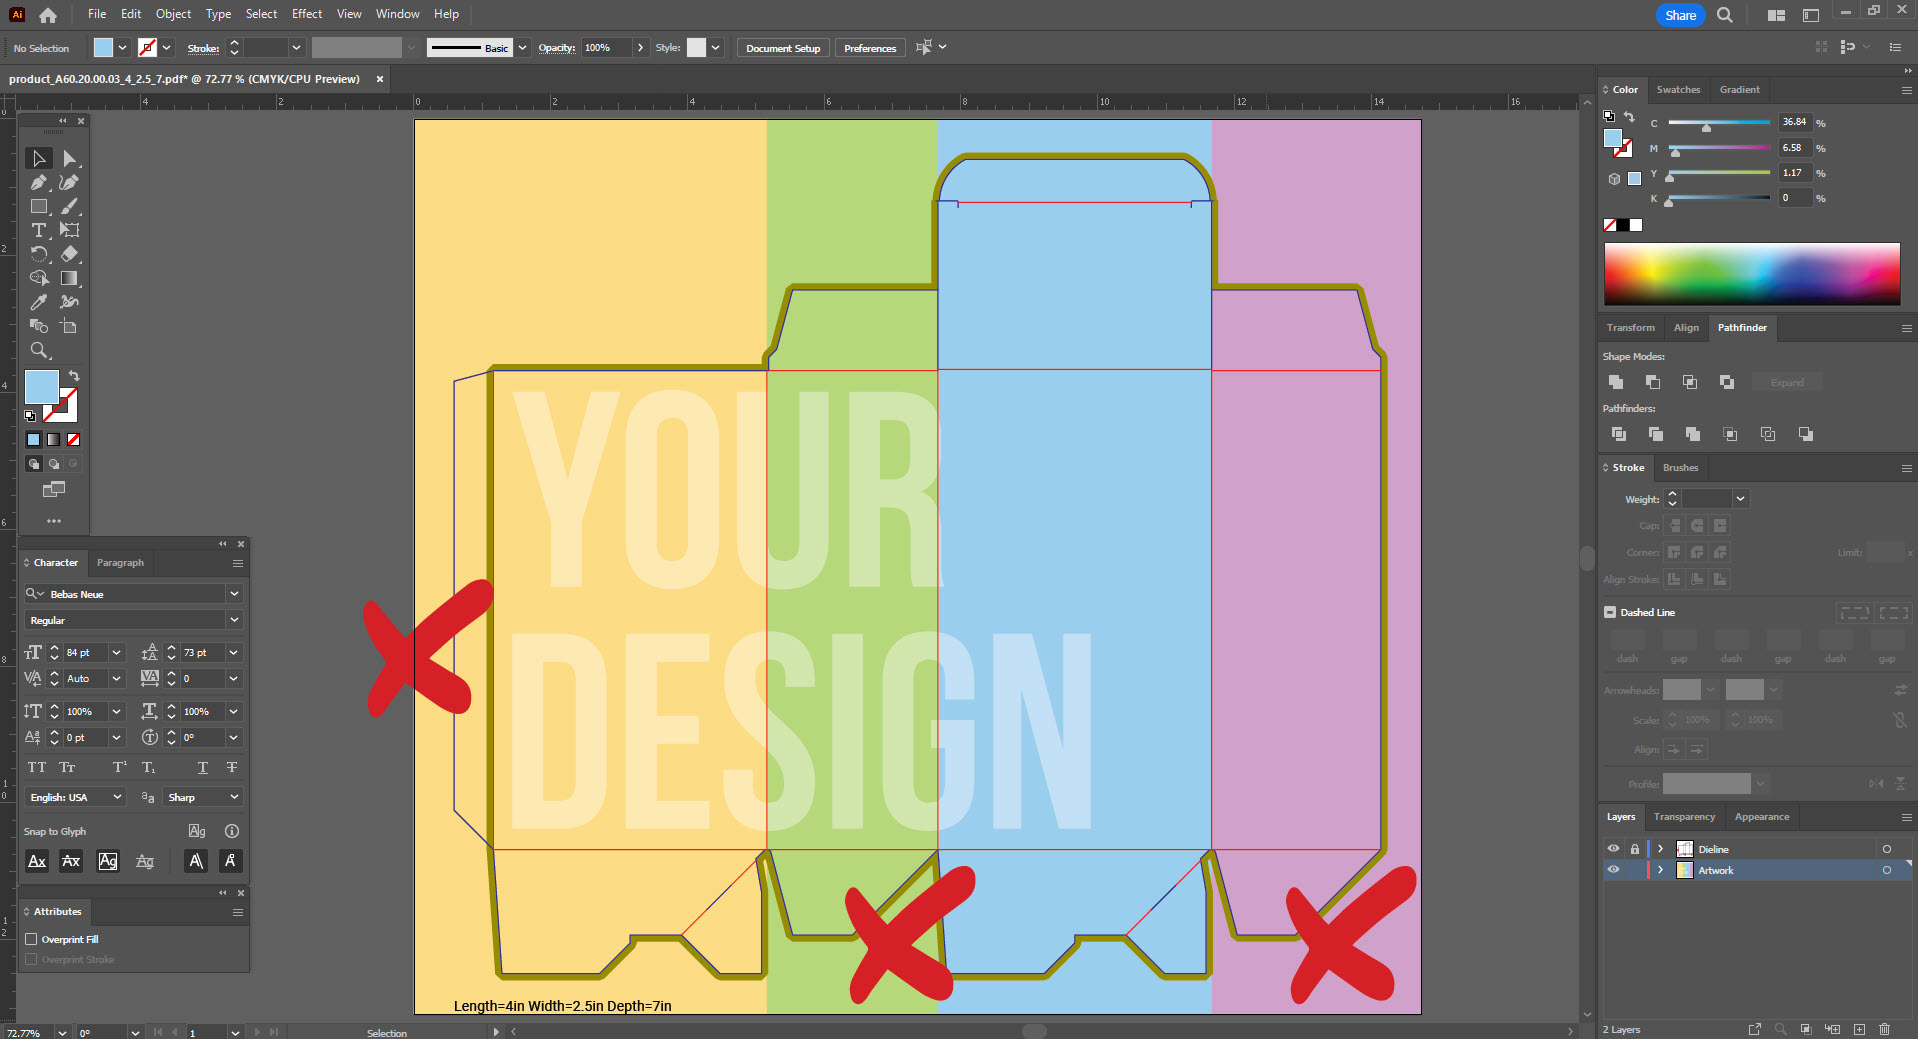
Do not trim the design to shape.
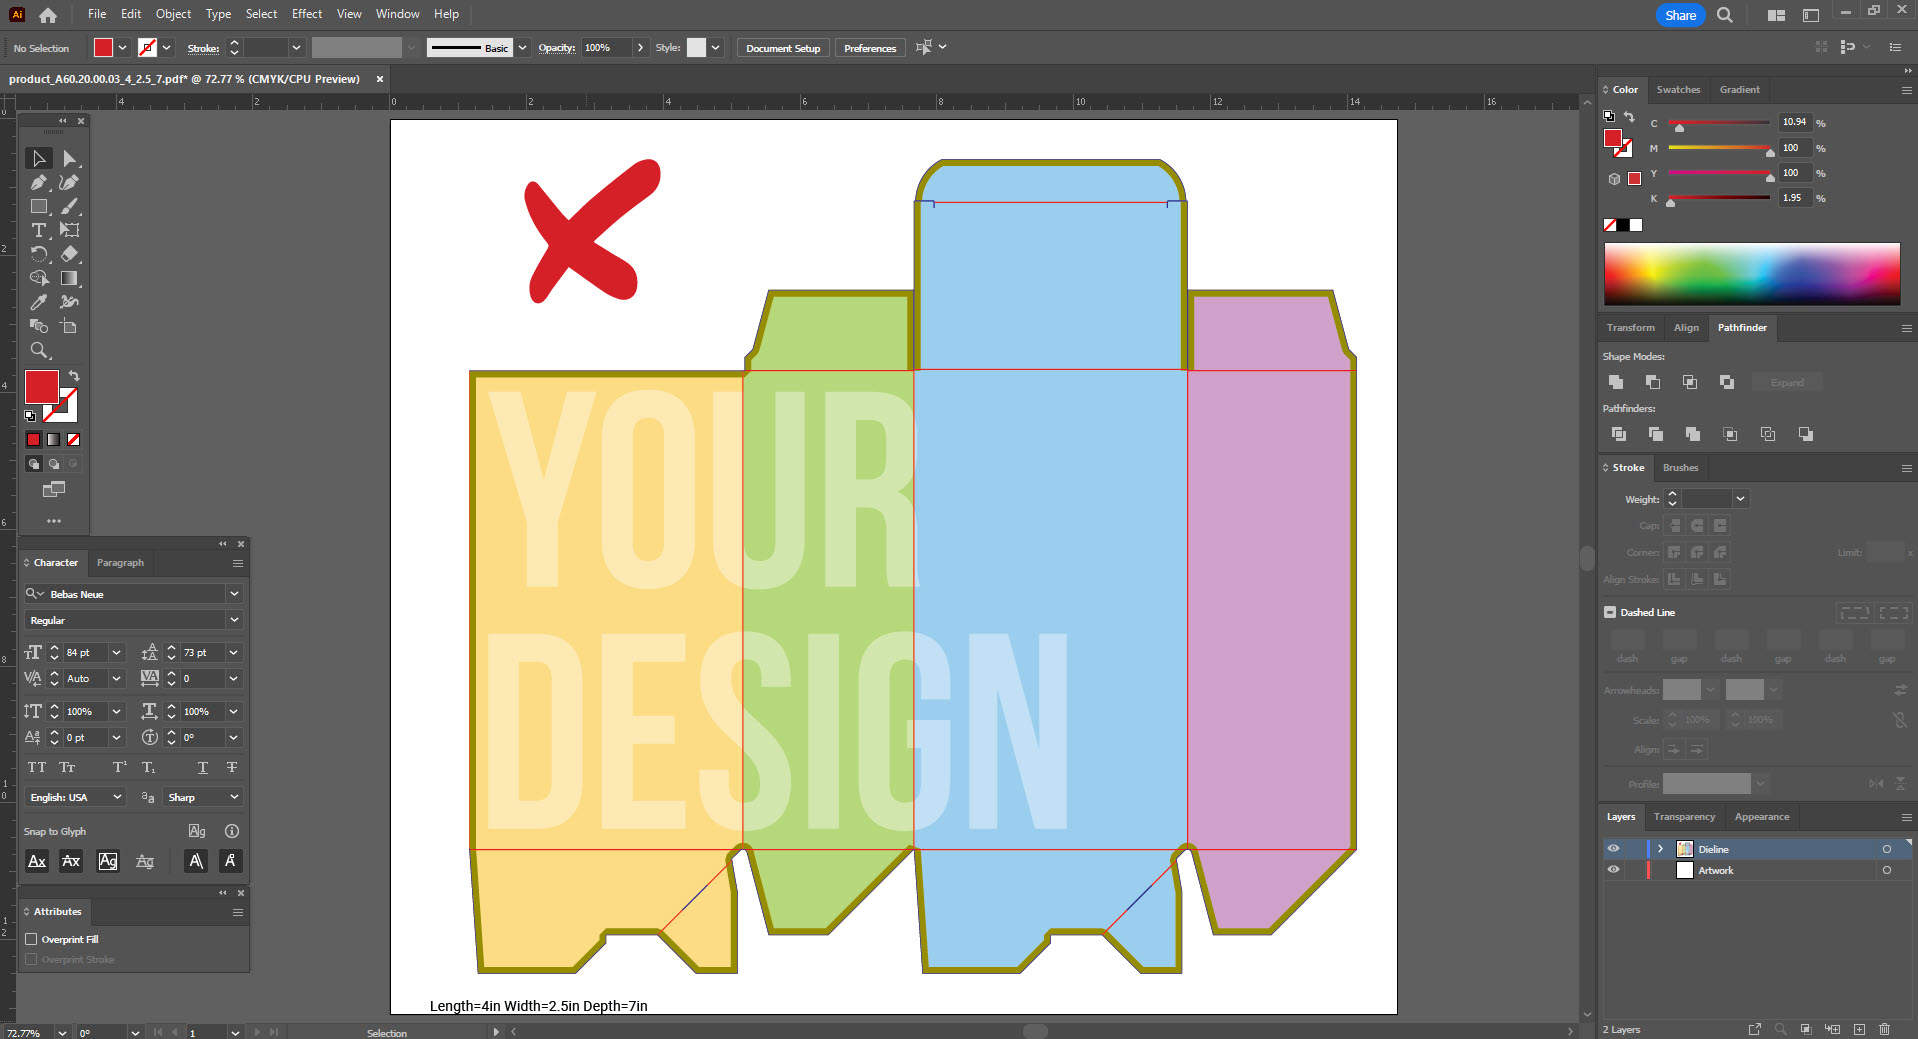
Keep all important design elements (text, logos etc.) at least 0.125'' away from trim and fold lines.
If you use images in your design they must be set to 300ppi resolution and to CMYK colour mode.
Line and stroke thickness should be at least 0.25pt.
Export and upload print-ready PDF
1. Before exporting the PDF, turn off the visibility of the Dieline layer by clicking the eye icon next to it.

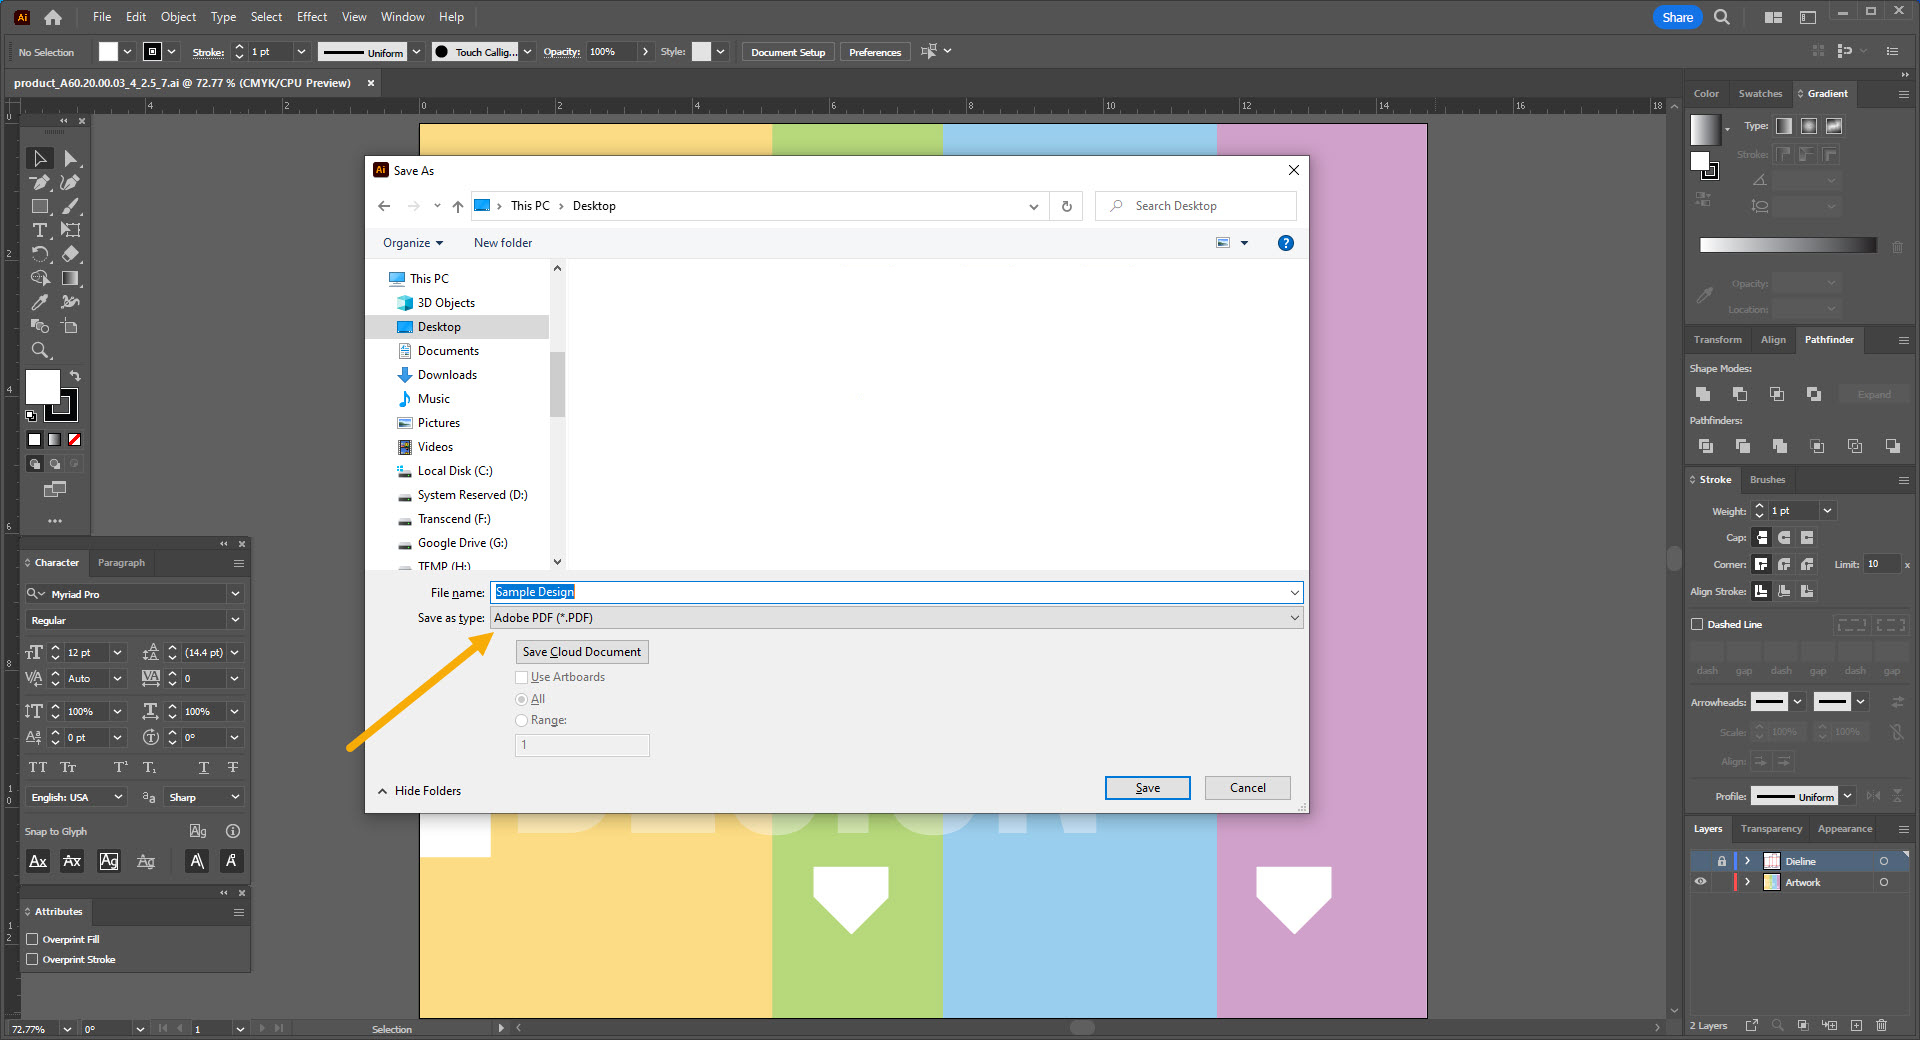
2. Go to FILE / SAVE AS, choose the destination for your file on your hard drive, and choose PDF from the 'Save as type' dropdown menu. Click Save.
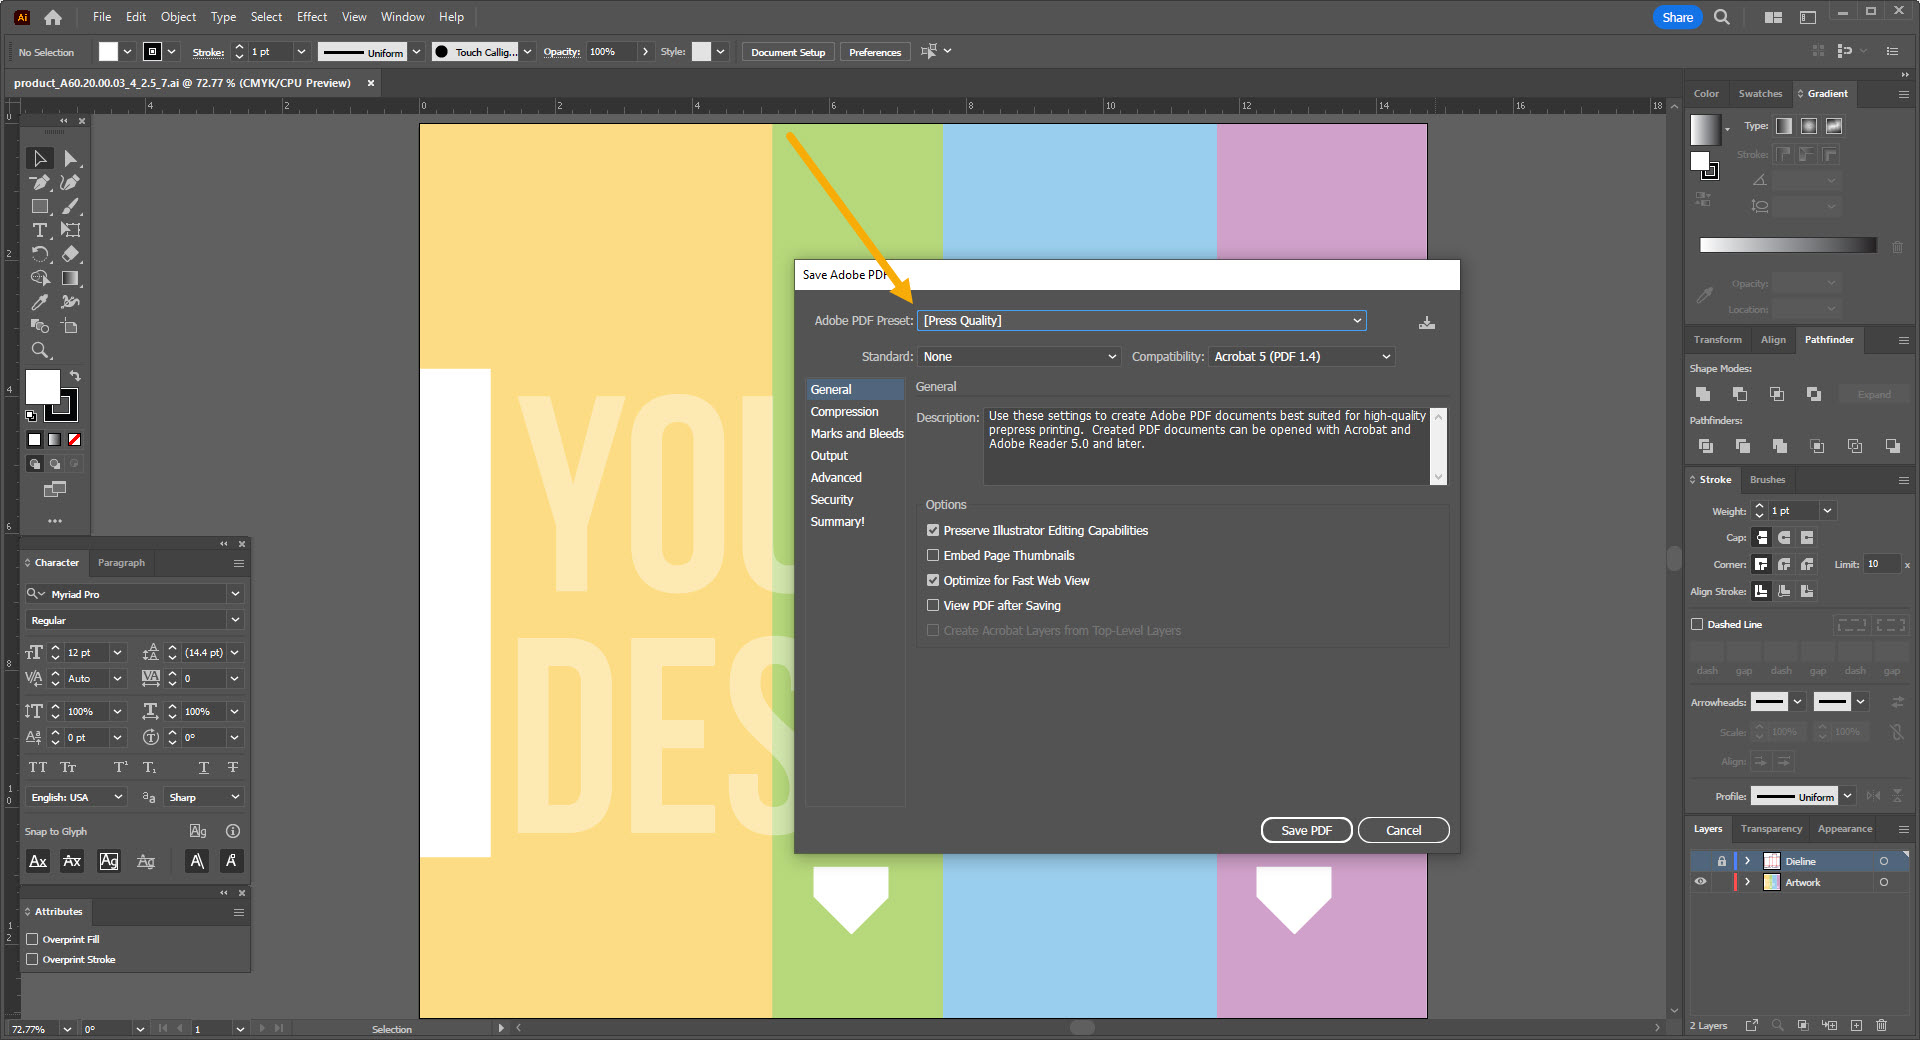
3. A new dialogue box will pop up. In the Adobe PDF Preset dropdown menu choose Press Quality and click Save PDF.
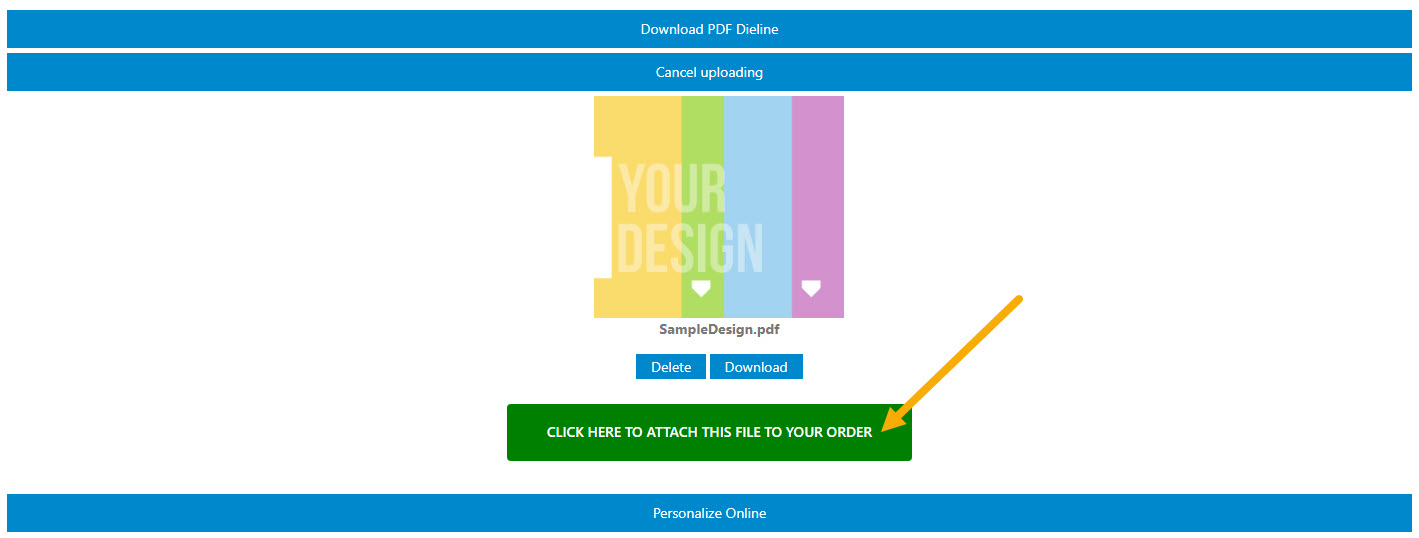
4. To upload your PDF and add it to your order, go back to the page where you generated the dieline template. Make sure you enter the box dimensions that correspond to your dieline file. Click Upload Your Design.
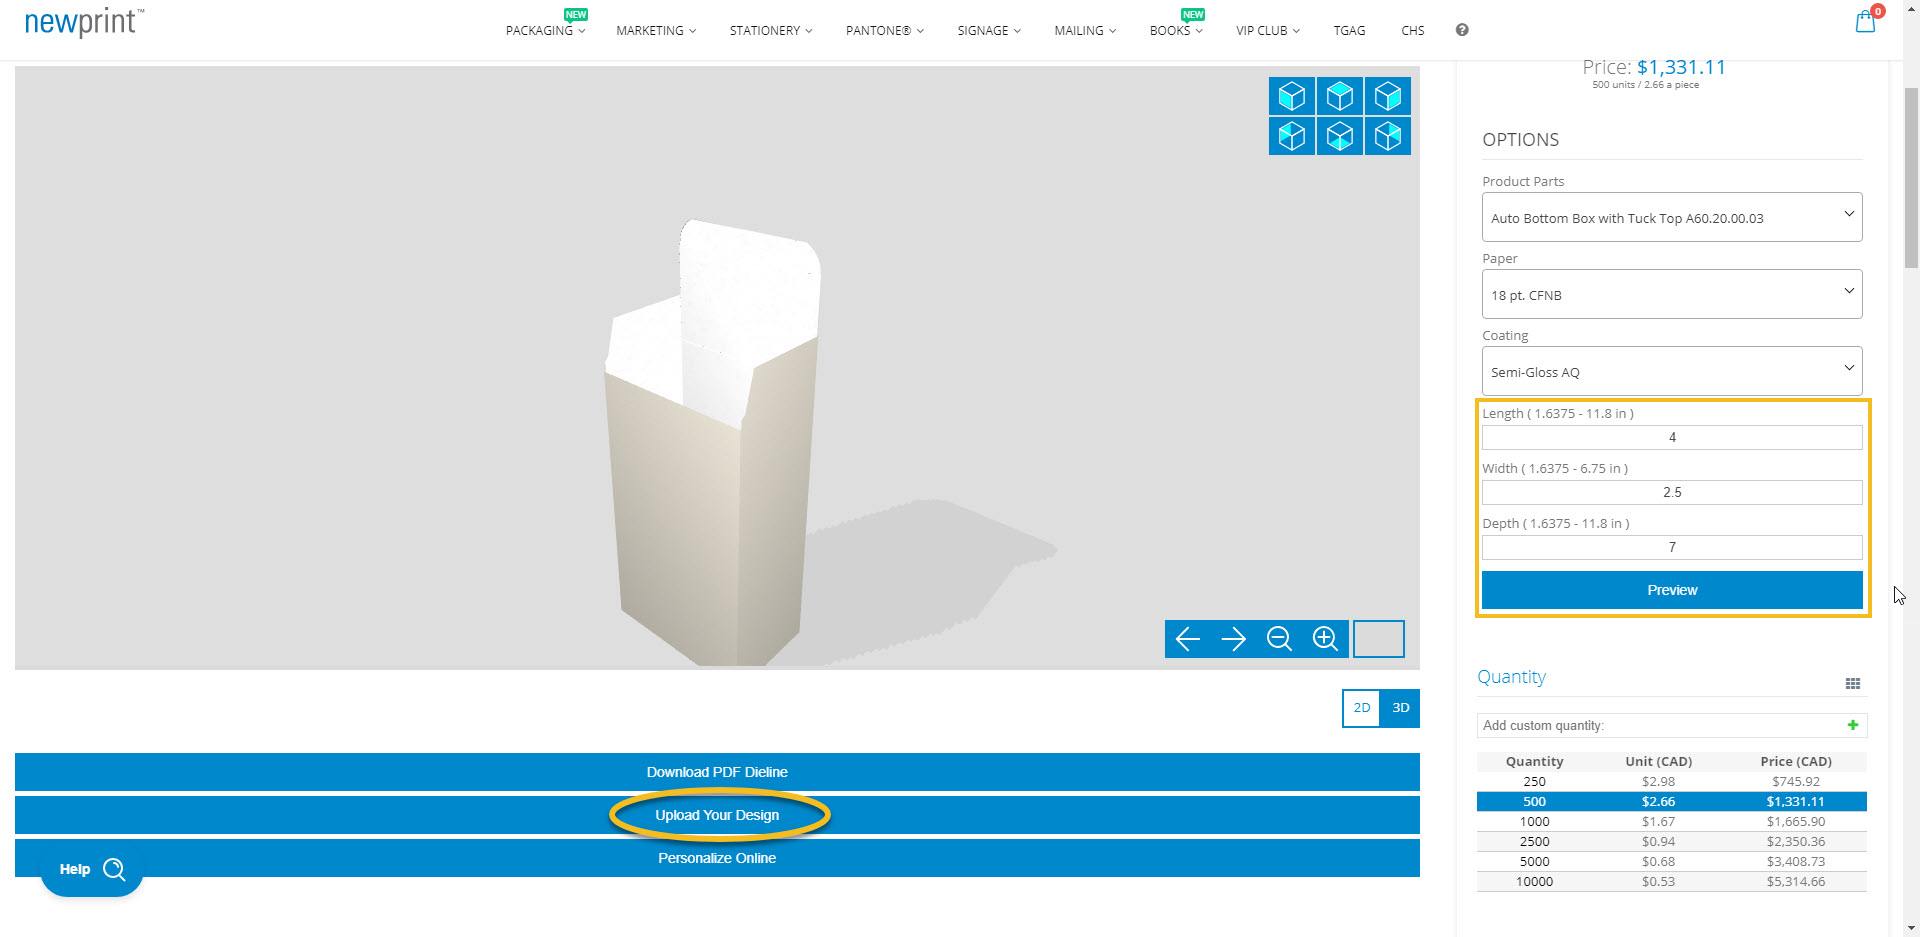
Once the file uploads, you will see 2D and 3D previews of your design.
Add the file to your order.