Do you want to export Canva to PDF and make sure it will print correctly? We have a guide to help you do it quickly and efficiently.
Online design tools such as Canva are gaining popularity. We are noticing more and more clients submit us print files generated using Canva. And it is understandable why it is so. Canva offers more than enough templates and options that allow everyone to create good looking graphics. However, there are some basic print design principles that must be followed in order to export Canva to PDF correctly for print.
Set up your files correctly
When setting up your document for print, whether you are using Canva , Adobe or some other software, the main principle is this: the document size should match the required printed size. So for example, if you want to print a 6 x 4 inch postcard, the trim size of your design file should also be set to 6 x 4 inches.
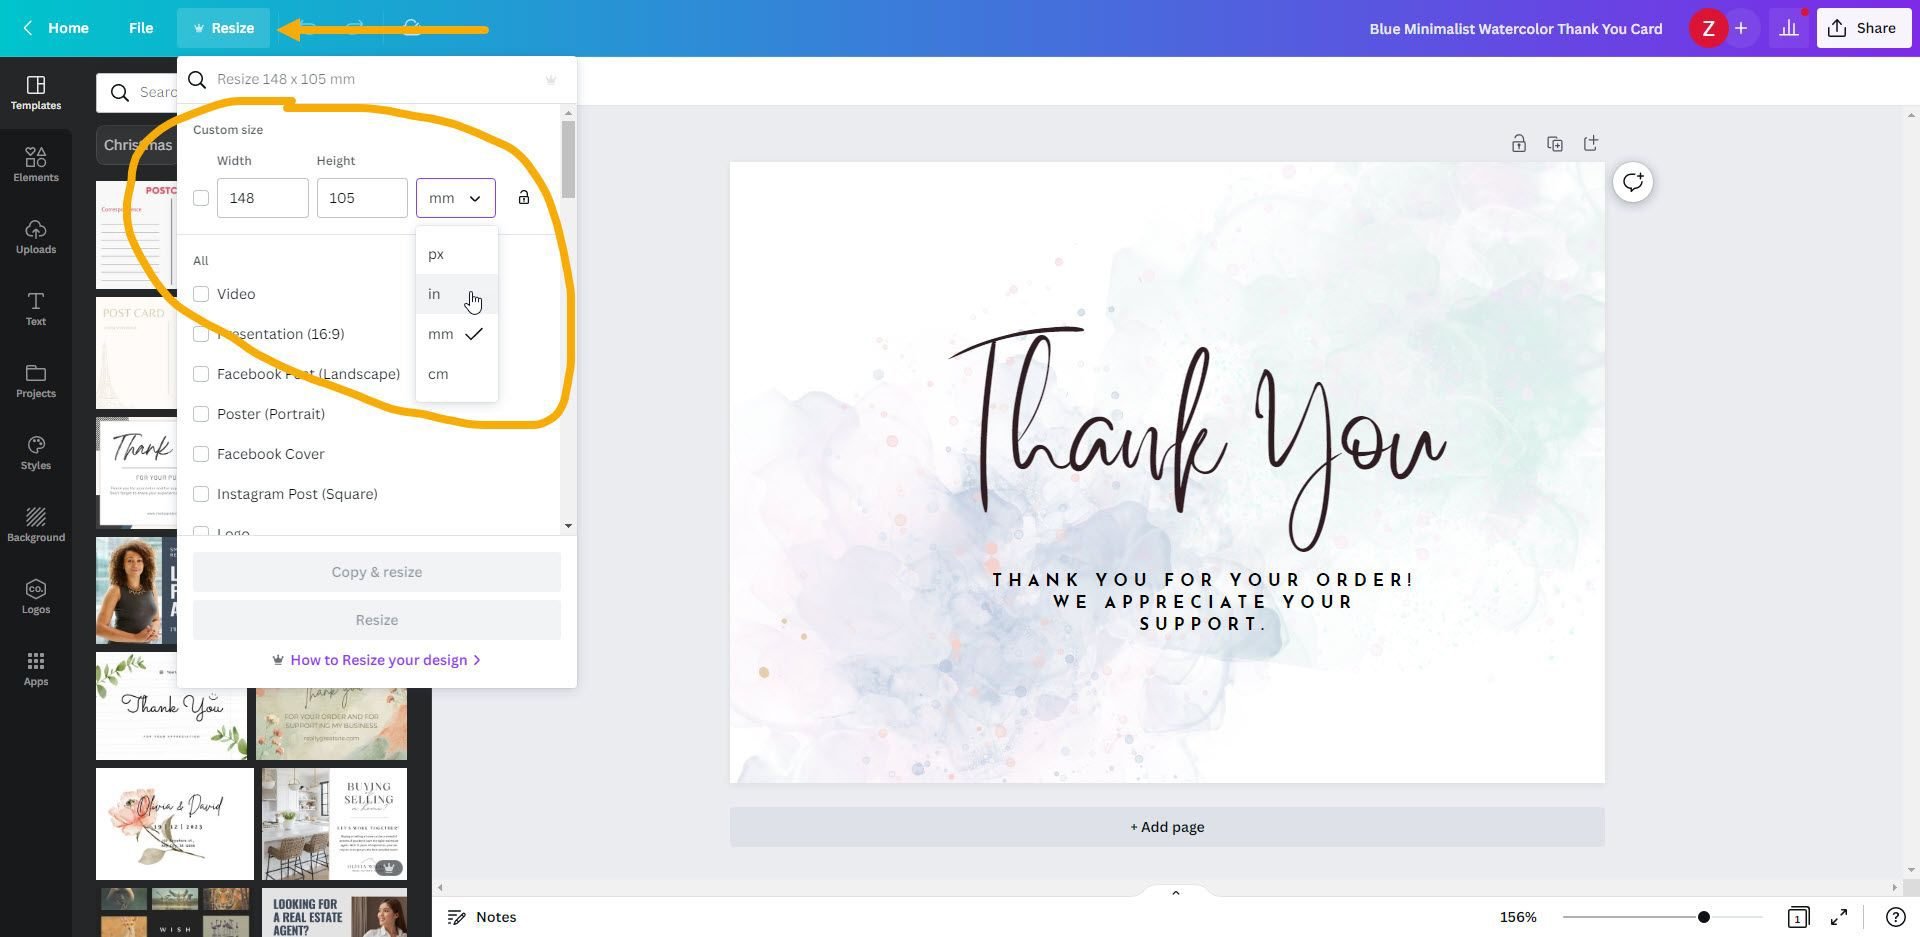
One more thing to pay attention to are the units of measurement. When creating a new file you will have several options when it comes to units (in, cm, mm, px…). Make sure you select the right one, as this is one simple step that can get overlooked.

Trim size, bleed size and safe zone
If you are one of those Canva users who don’t have much print design experience, it is important to be familiar with these three terms:
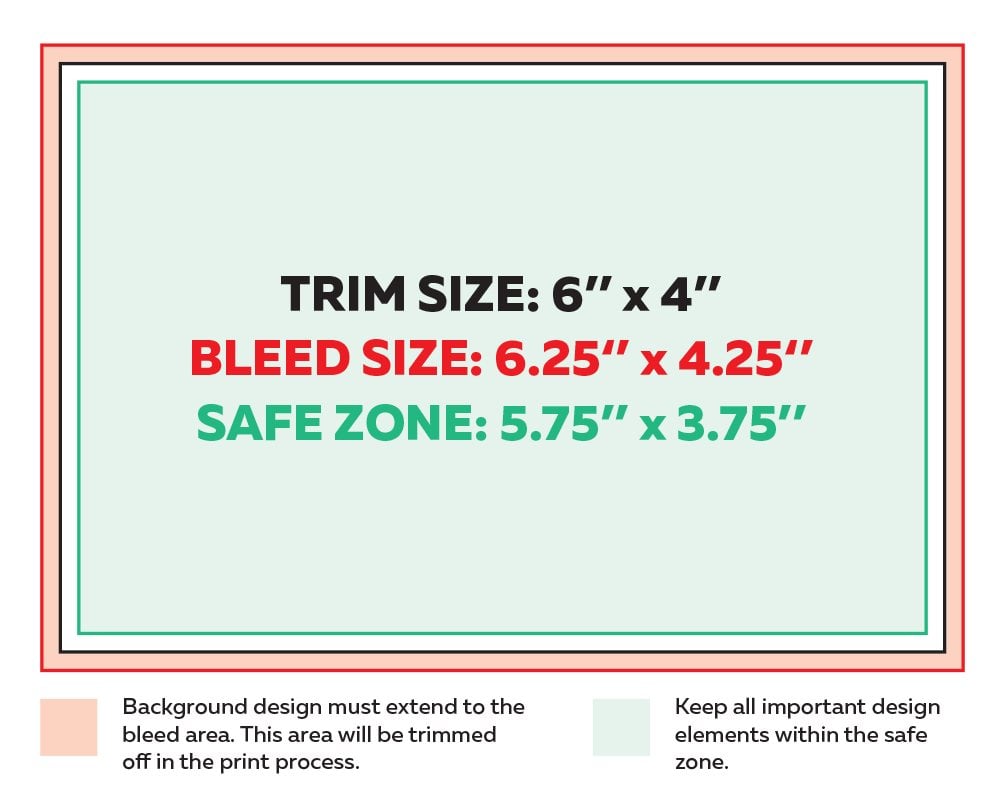
Trim size is the size of a printed product once it is cut to its final dimensions. Printing machines use large sheets of paper so what ever is printed on those sheets needs to be cut to its final size.
Bleed is a small area that extends from the trim size of your print-ready document. Bleed area is usually 0.125 inches on all four sides of your document. It is necessary because paper can shift a little bit during the print process. In case of any shifting, it prevents having white edges on a printed piece once trimmed to its final size.
Safe zone is an area in your design where it’s recommended to keep all the important design elements, such as text and logos. Safe zone usually ends at 0.125 inches away from trim and fold lines, but it can be different depending on the product you want to print.
So, in our 6 x 4 postcard example, the trim size would be 6 x 4 inches, the bleed size would be 6.25 x 4.25 inches, and the safe zone would be 5.75 x 3.75 inches.
Export Canva To PDF For Print
Unlike some other online design services that are focused more on web and social media graphics, Canva actually has good options when it comes to exporting print PDFs. However, in order to enable Canva export to PDF for print, you would need to purchase the Pro version. The free version does not have some of the options necessary for correct PDF export.
So, let’s get to it.
Start designing
To start your design, the easiest thing to do is to choose one of Canva’s many templates. You can filter your search and display only the templates for print products.
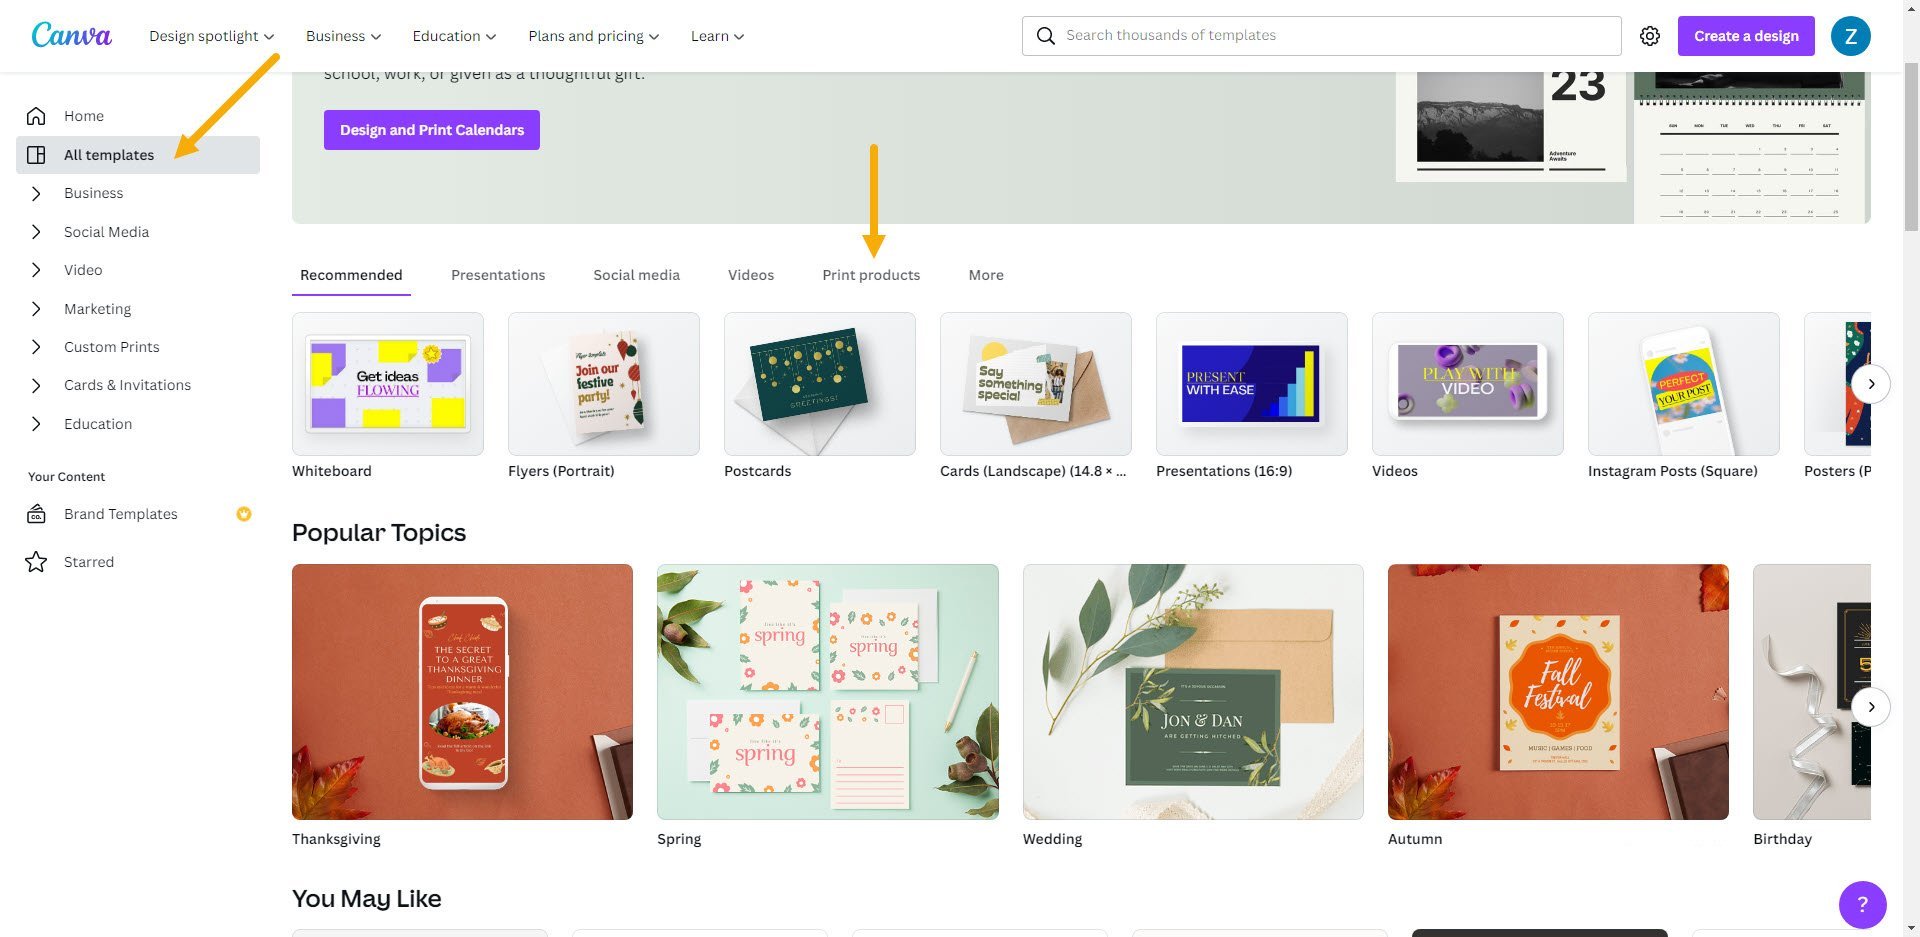
Alternatively, you can also create a new project with custom dimensions.

In this example however, we are going to stick to provided templates and choose a horizontal postcard template that we like.
Customization
Once you click on the template you like, click “Customize this template”.
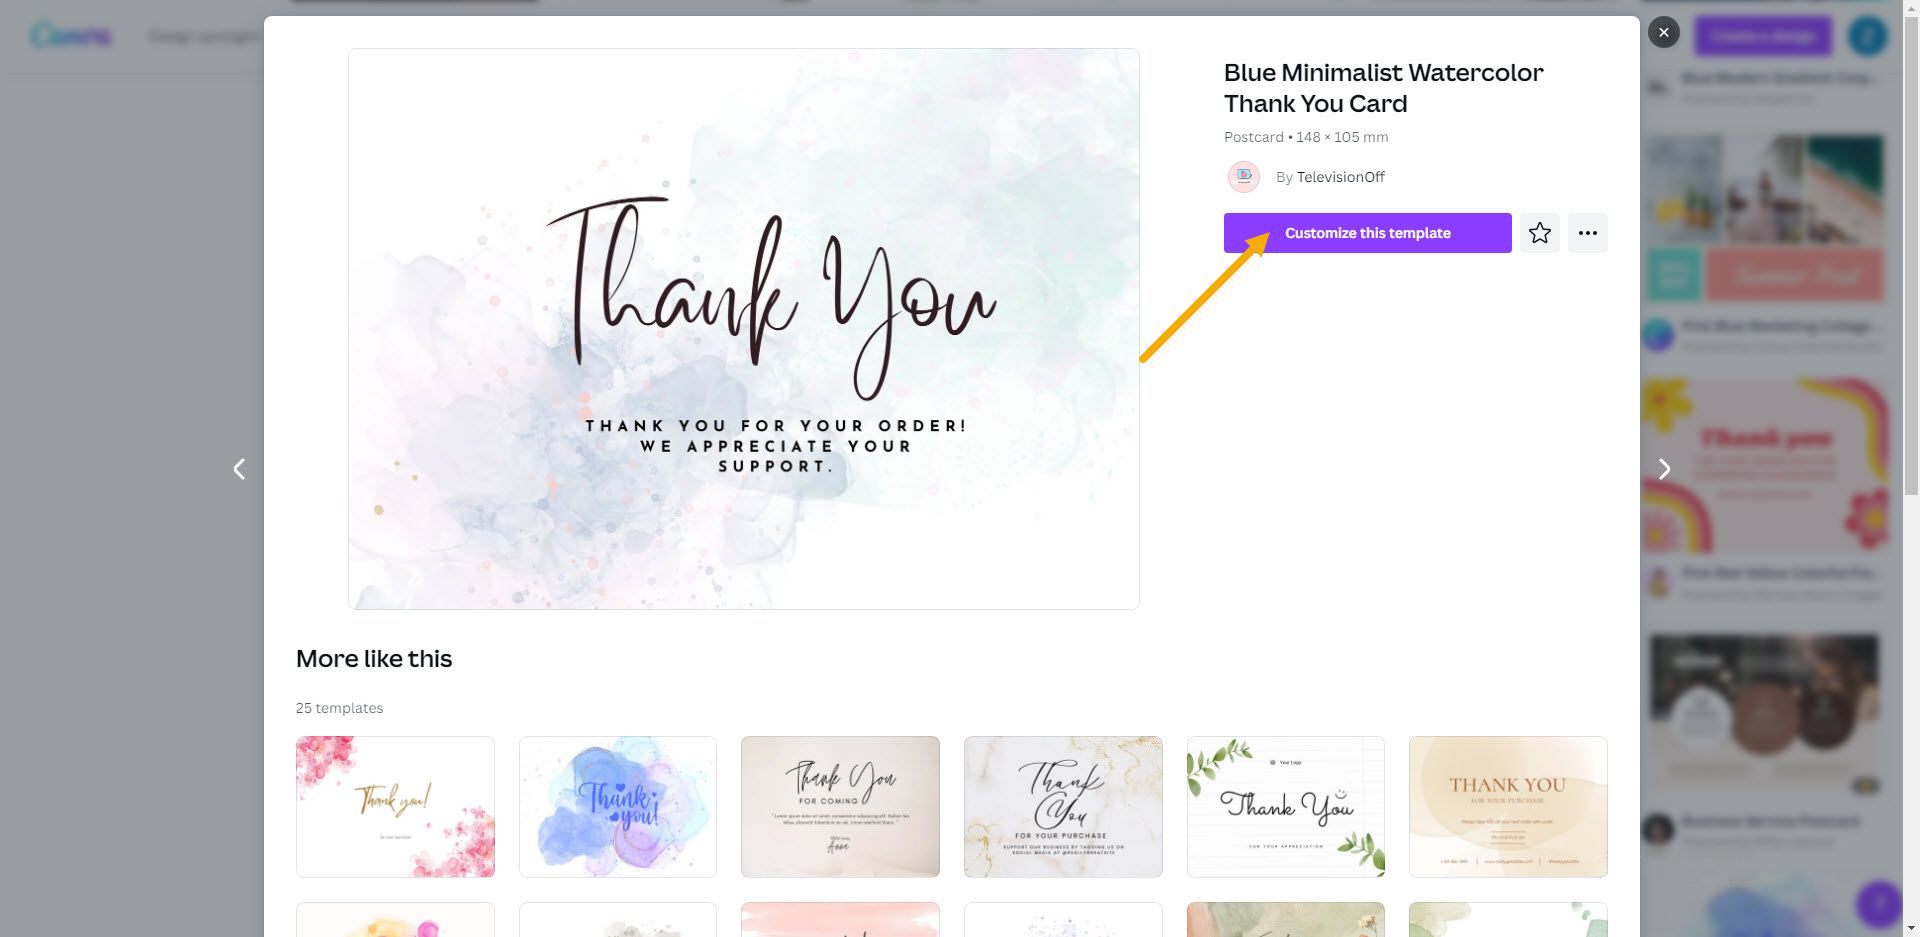
As we mentioned in the beginning of this text, it is crucial to set up the size of your design file correctly. This size must match the size of an actual product you want printed. So, if we want our postcard to be 6 x 4 inches once printed, our design file must also be resized to 6 x 4.
Resize
You will see the Resize button in the top left corner of your Canva project. Here you can choose your units of measurement and change the size.
Modify
At this point you can modify the chosen template. You can use all the tools Canva offers, such as changing the text, the colours, adding photos and shapes etc. Just keep the safe zone in mind. Don’t put any important design elements too close to the edges of the document.
Export
Once you are happy with your design, you can export Canva to PDF. Here’s how:
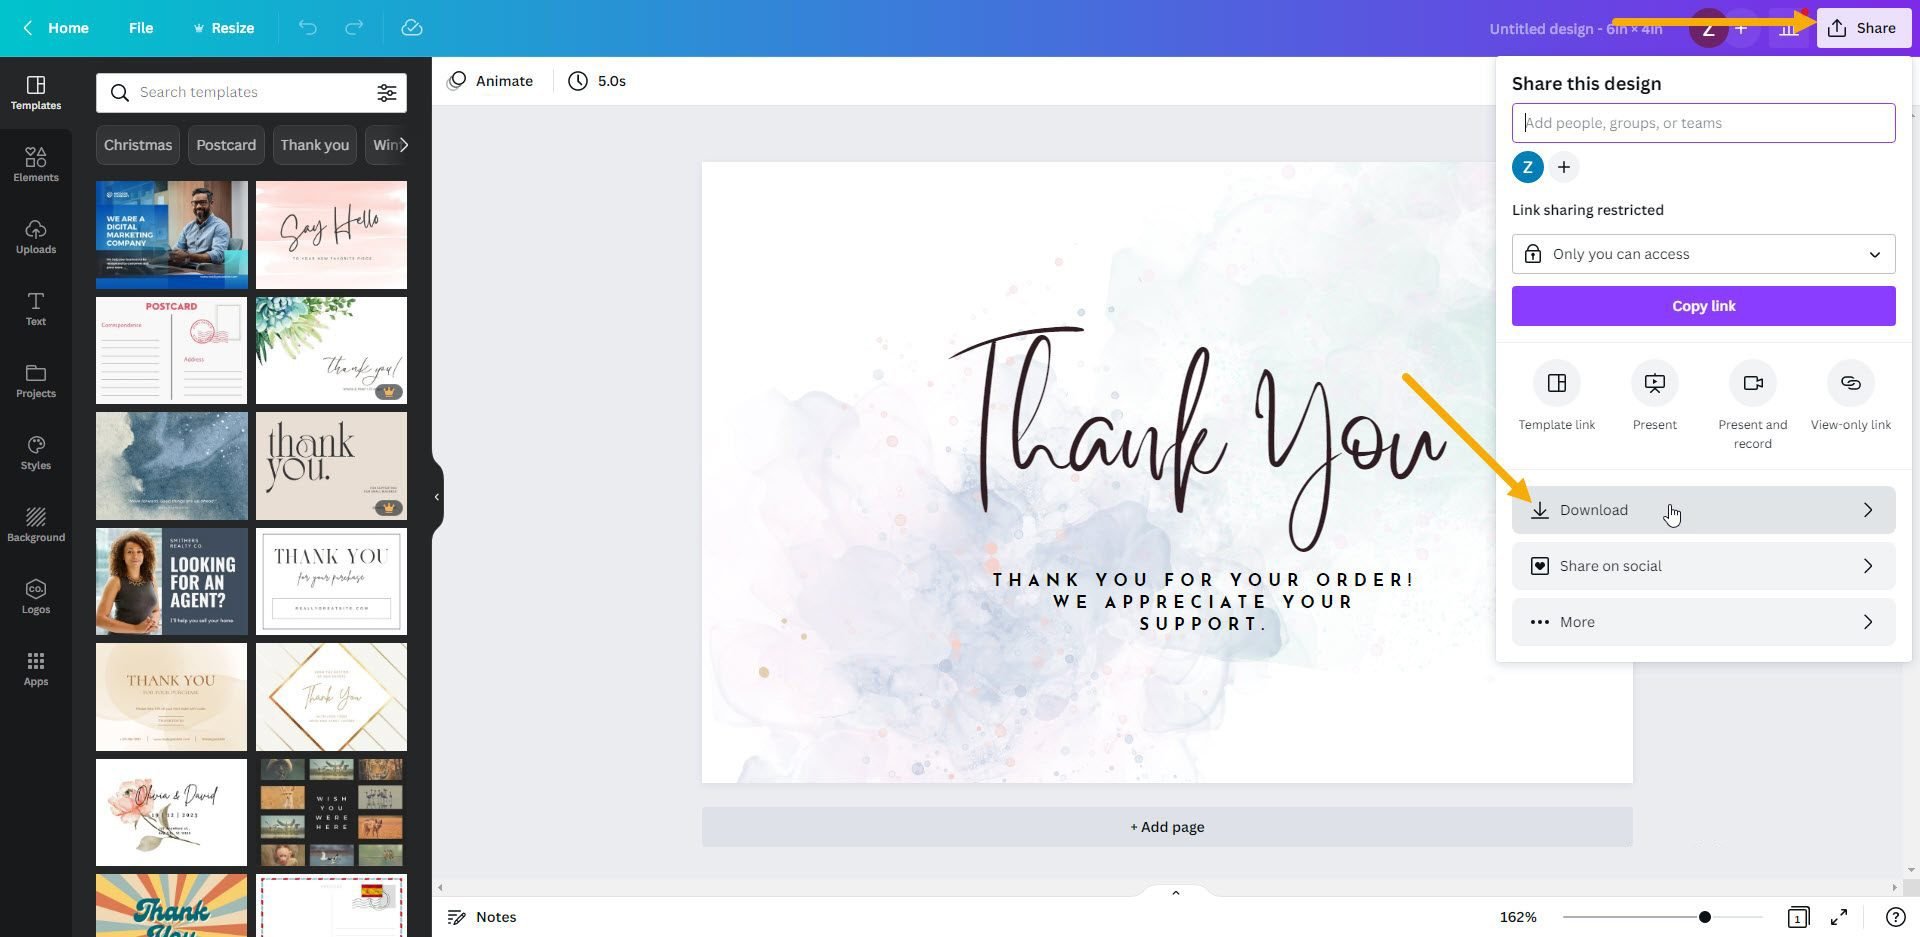
In the top right corner of your project, click Share and then Download.
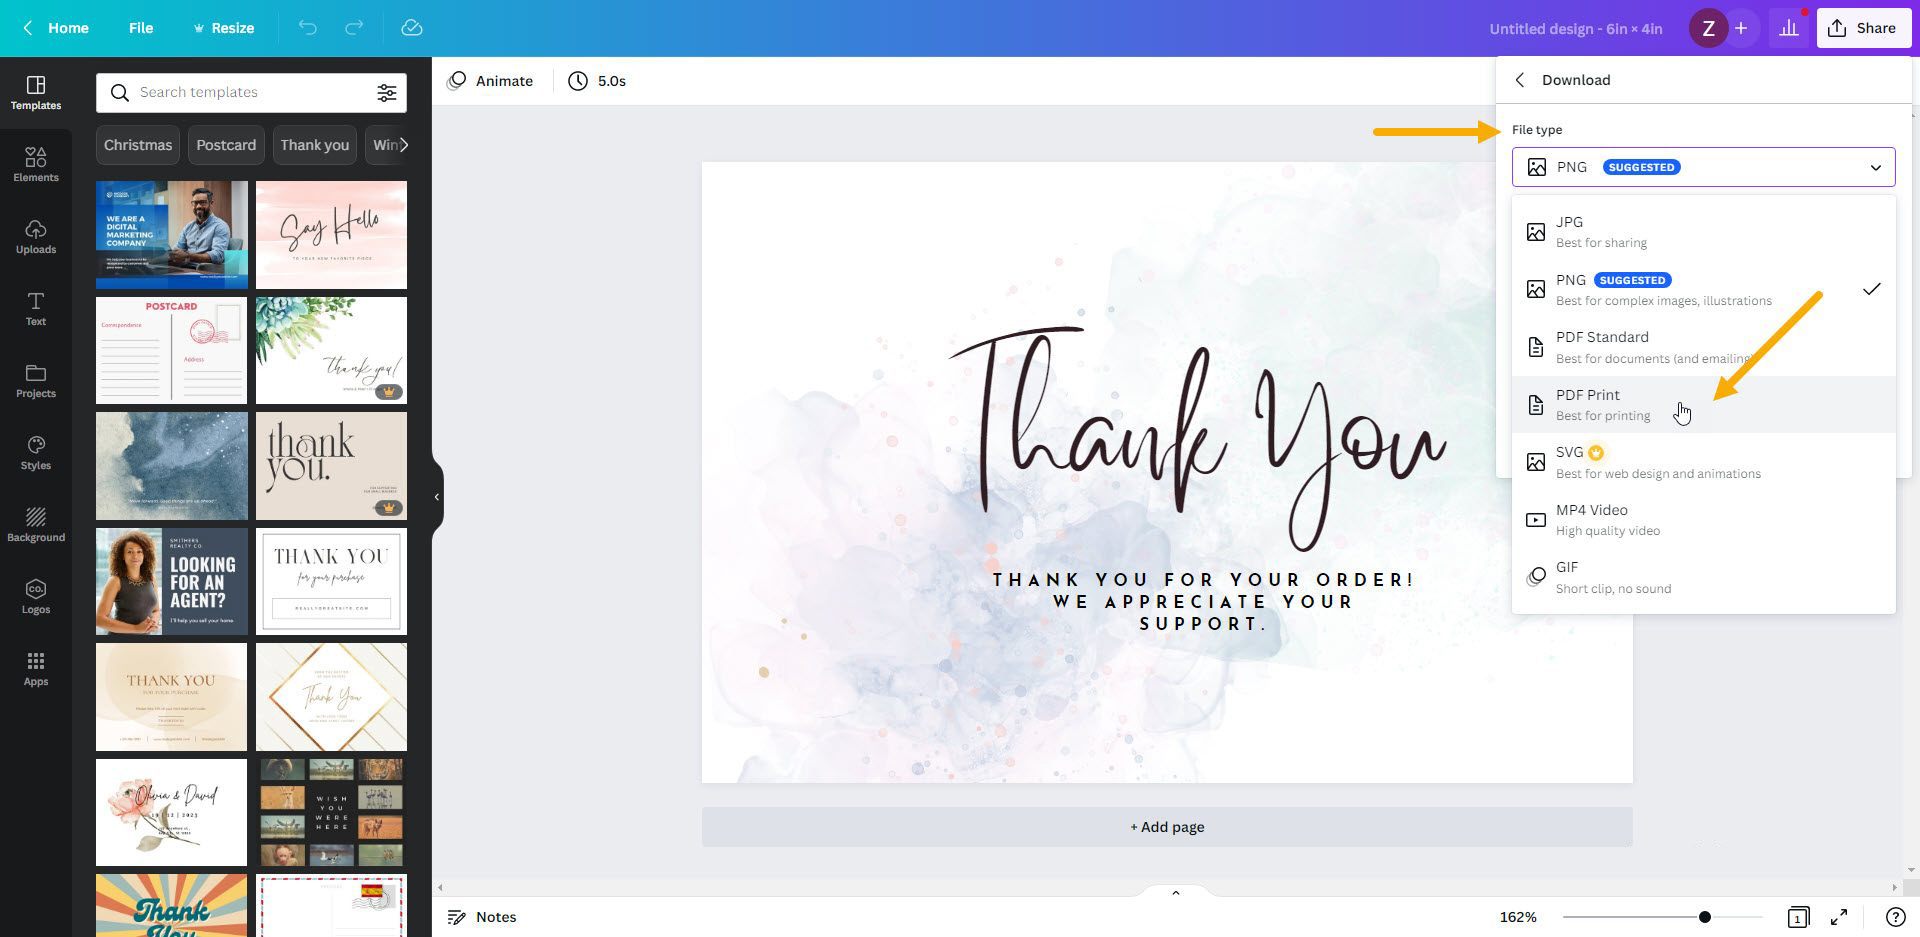
Under File type, choose PDF Print.
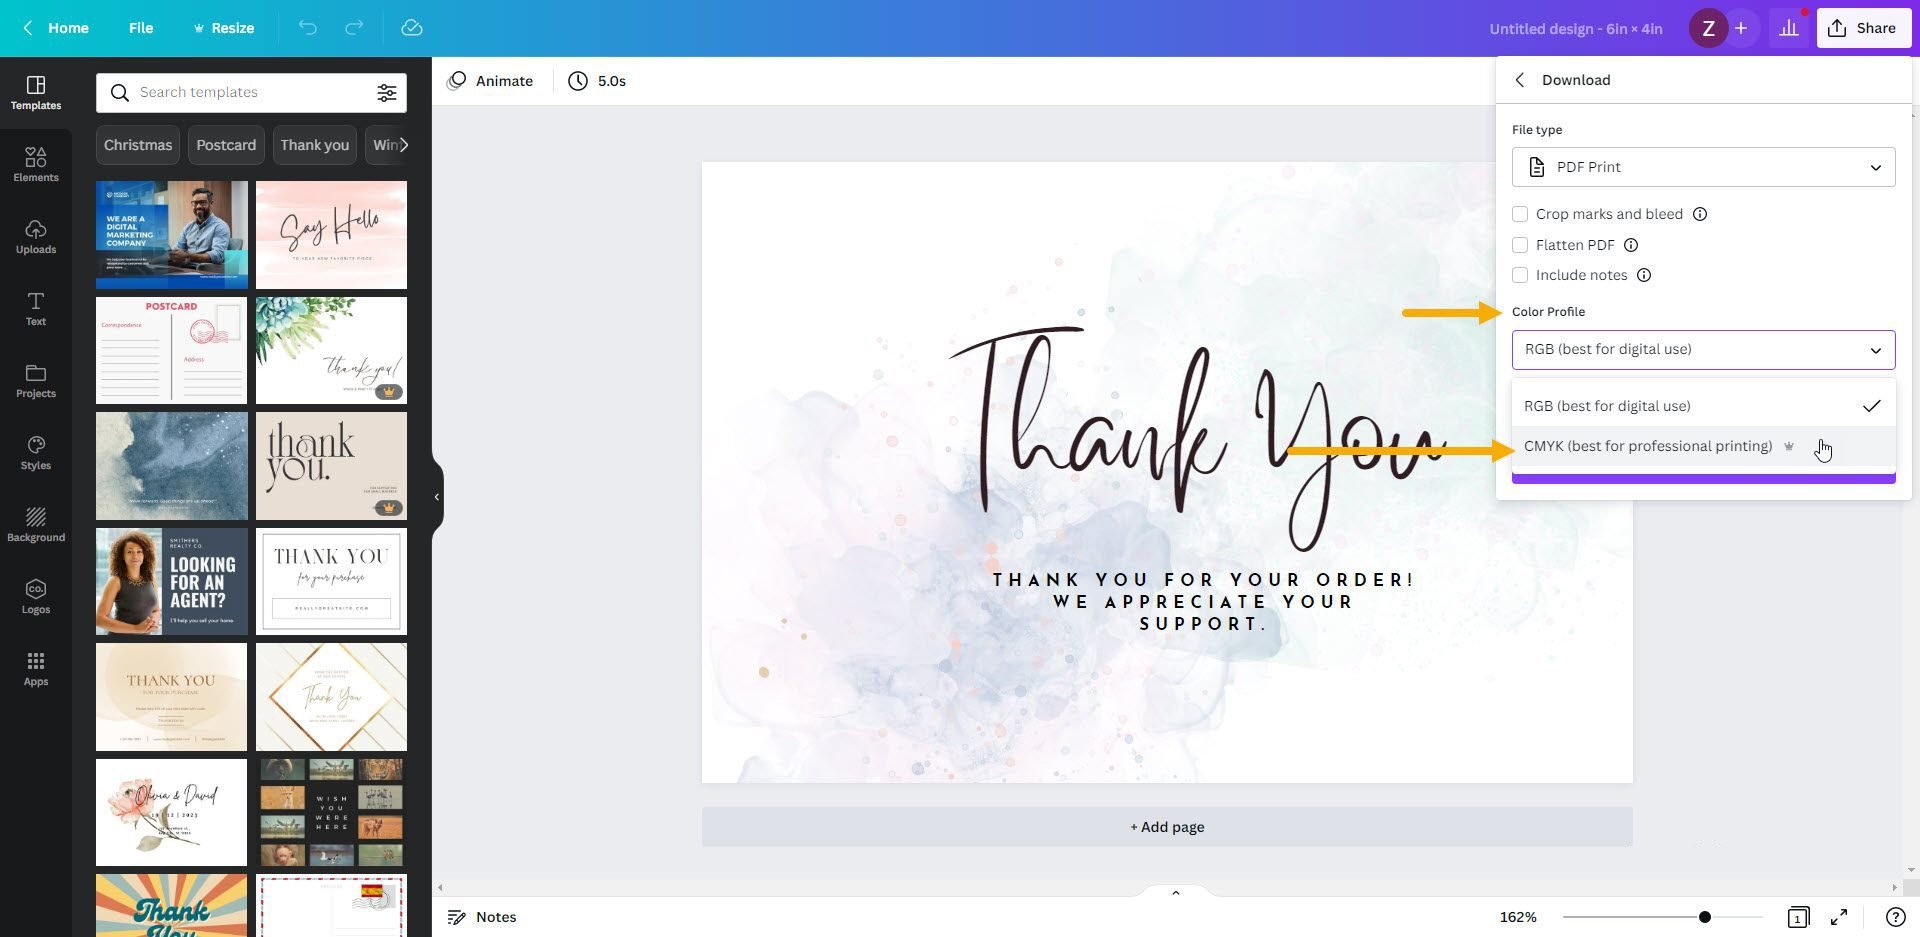
Check Crop marks and bleed. This will automatically add the bleed area to your PDF file.

Lastly, under Color Profile choose CMYK and then click Download.
If you need to design product packaging in Canva, read our Canva VS Adobe Express blog post.
We hope our guide has helped you export Canva to PDF without problems. Following our steps should ensure your file will print correctly. If you have any Canva tips and tricks, share them with our community. Or if you have experienced any troubles, let us know and we will try to offer practical solutions for your problem.